HOME | DD
 deviationanonymous — Scindo Prime build - Stage 1
#axe #cosplay #prime #wip #wood #workinprogress #scindo #warframe #deviationanonymous
Published: 2016-05-01 20:33:55 +0000 UTC; Views: 554; Favourites: 3; Downloads: 0
Redirect to original
Description
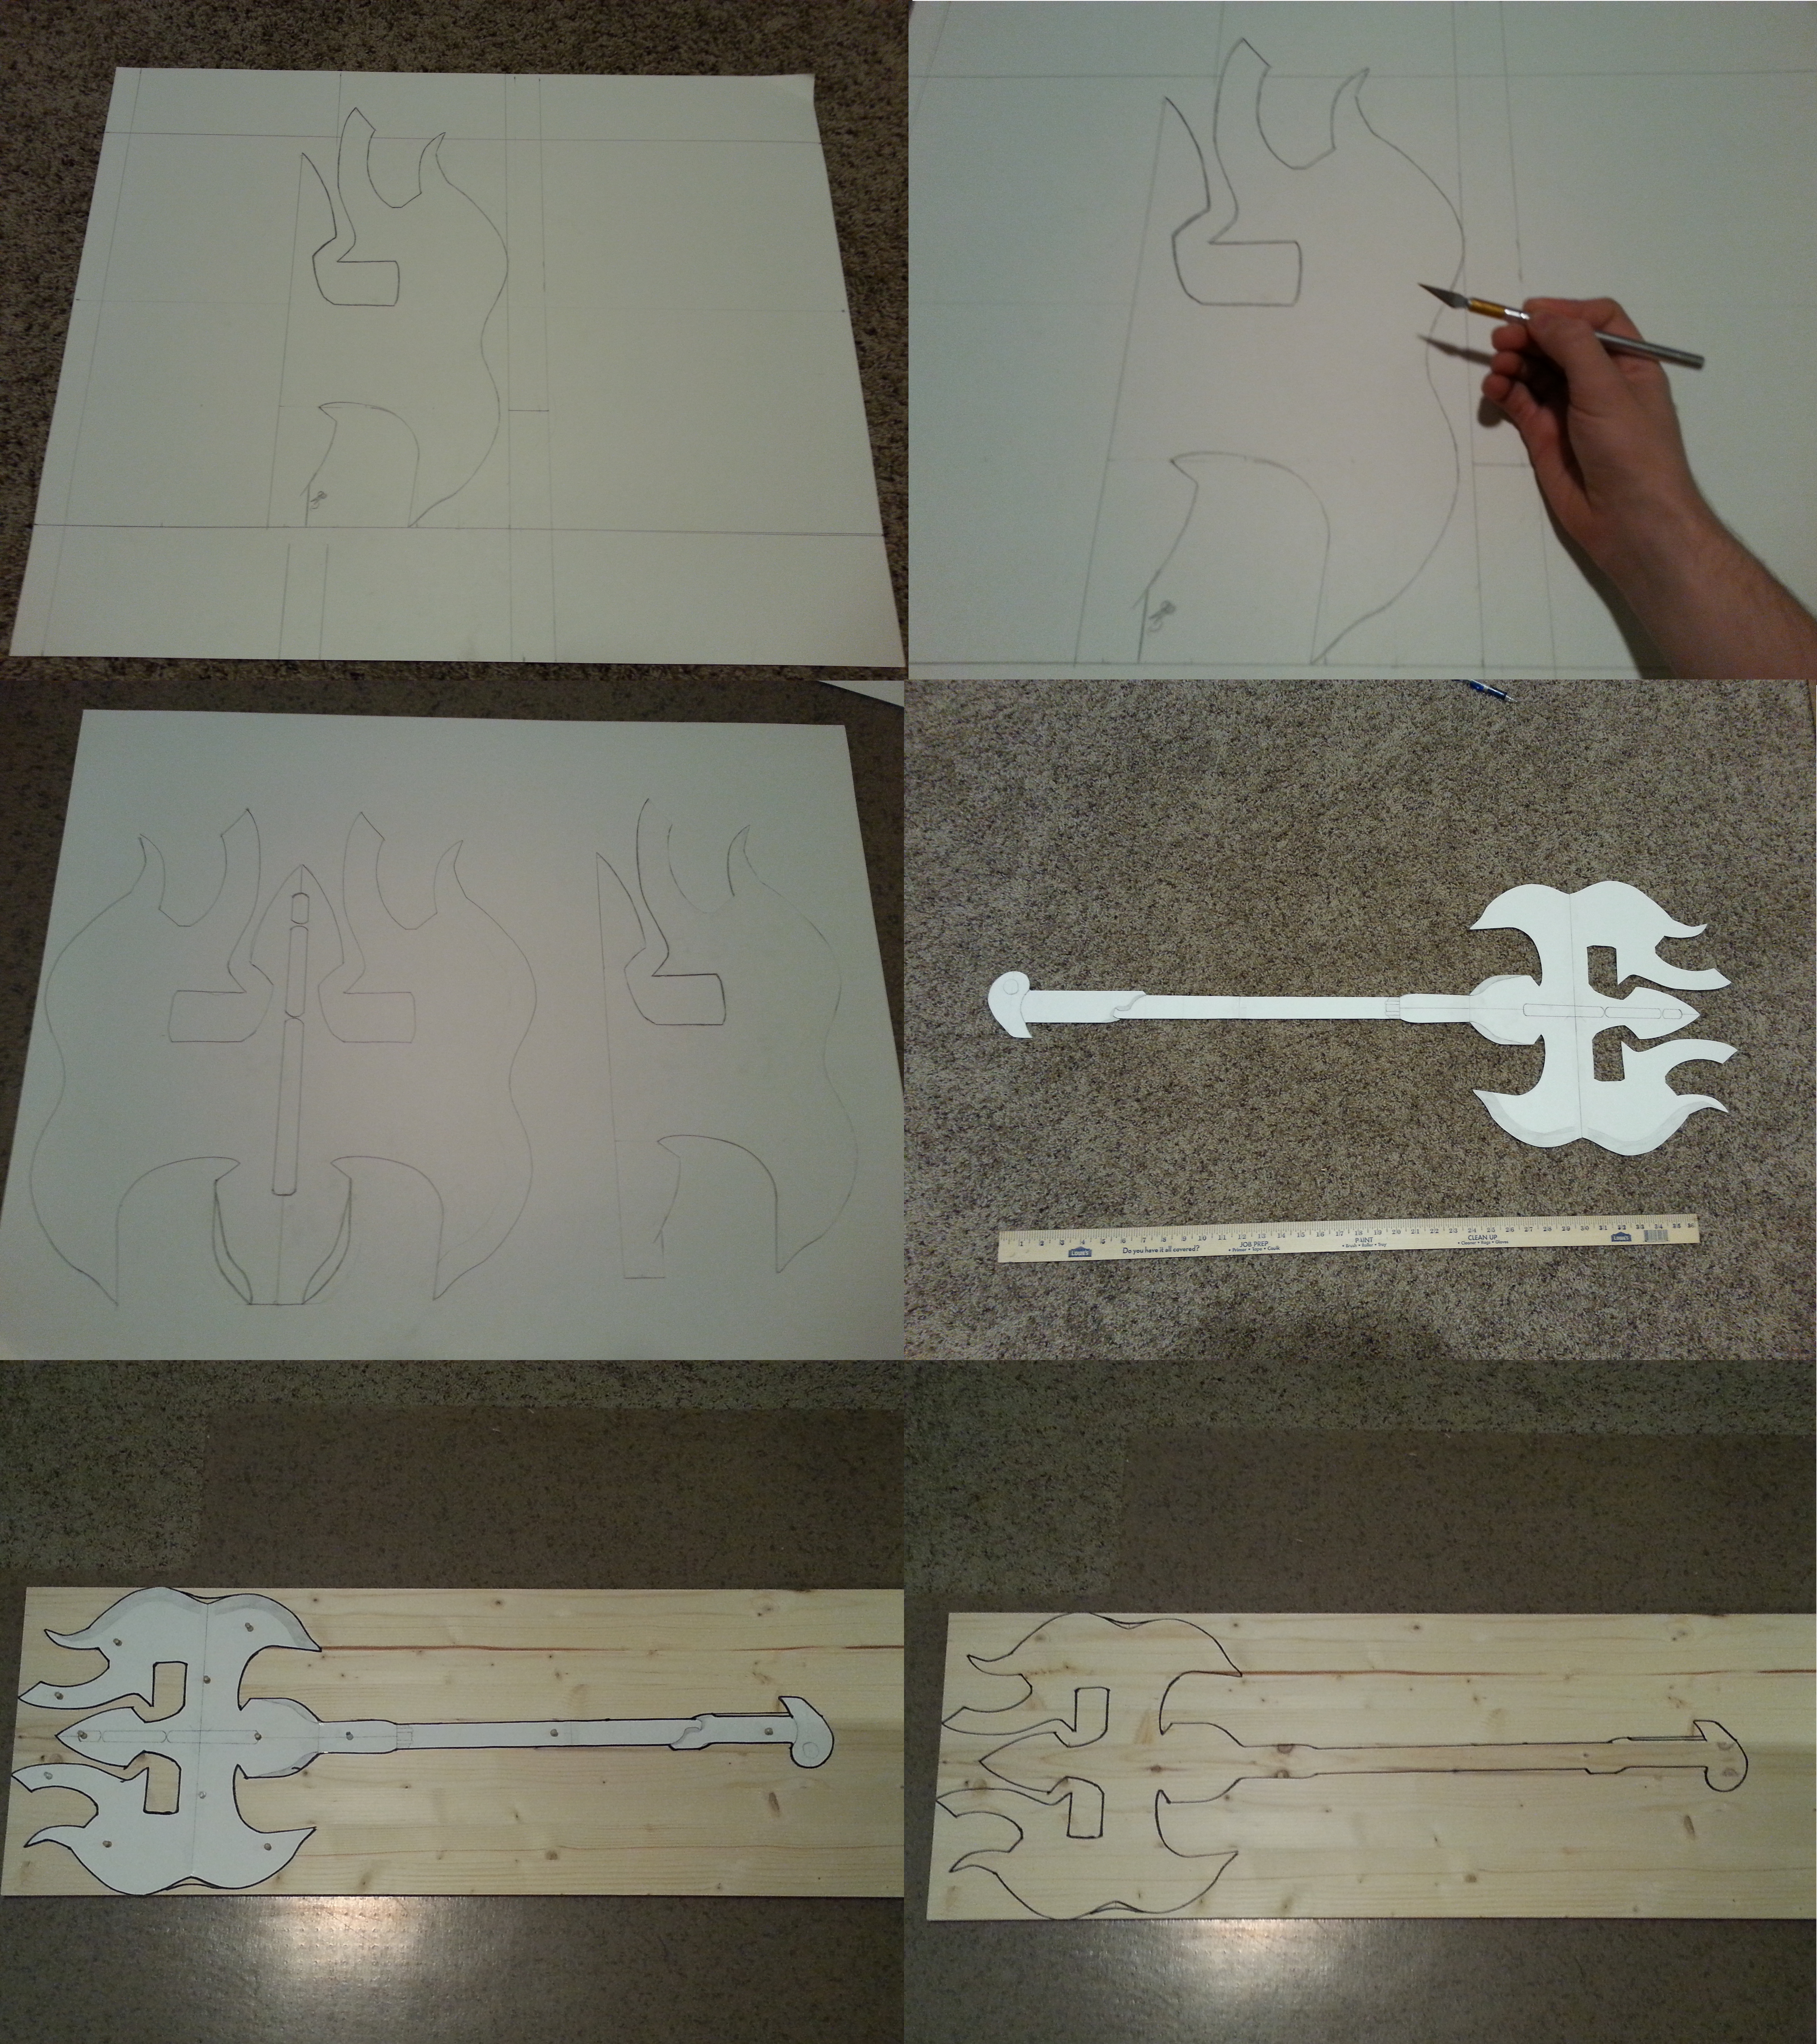
Okay! So, it's finally done. I've built my Scindo prime, and although it took a very long time in the making, I have not forgotten that I was going to make a tutorial out of it. So, here we are. I took pictures at each stage in the build, and compiled them into "stages" to keep from having to post about 20 individual images to DA. Anyhow, on to the build! (images are referred to in order from left to right, top to bottom)Okay, well the first part of any project for me is design. I took some time while playing Warframe, and saved some platinum up to buy Scindo prime parts. I then build the weapon, and when it was finished I equipped it, and used screen capture software to record it from all angles. I also used an image of the weapon from the Warframe wiki, which helped a lot.
Next, I moved on to the design proper. In order to make my design symmetrical, I drew half of the blade, and cut it out with an Exacto knife. I then traced the pattern on a new piece of paper, folded it over to the other side, and traced the other side of the blade from the same pattern. I was lucky enough to get it right the first time (mostly, but more on that later), and decided to proceed with the build.
Next, I needed to figure out how long to make the handle. When I build things, I like to just start with 1 part, and scale everything else to match, so I used the size of the axe head to estimate the length of the handle in proportion to it. I used a yard stick to draw a straight line of that precise length, determined the widest point in the same way as the length, and drew the handle shape within those boundaries. This worked out quite well, actually, as the parts of the handle were able to be scaled separately to the head, but still be matched to it. I then proceeded to cut out the lower end of the handle, and the upper part, as I needed those patterns for pieces to add on to the side for extra thickness. After cutting it and tracing the parts, I taped the handle back together, taped it to the head, and... found the head needed a bit of an adjustment. I had to make it about 1 inch shorter through the middle of the head, horizontally, as it was not the correct scale. I also found the head's shape altered when I did this, so after I used thumb tacks to secure it to a piece of wood, and traced the pattern, I simply fixed the shape with a sharpie and looked it over. It looked good, so I decided to proceed to the next stage...
--> Stage 2! -->


