HOME | DD
 deviationanonymous — Scindo Prime build - Stage 3
#axe #cosplay #prime #wip #wood #workinprogress #scindo #warframe #deviationanonymous
Published: 2016-05-01 21:18:18 +0000 UTC; Views: 579; Favourites: 0; Downloads: 0
Redirect to original
Description
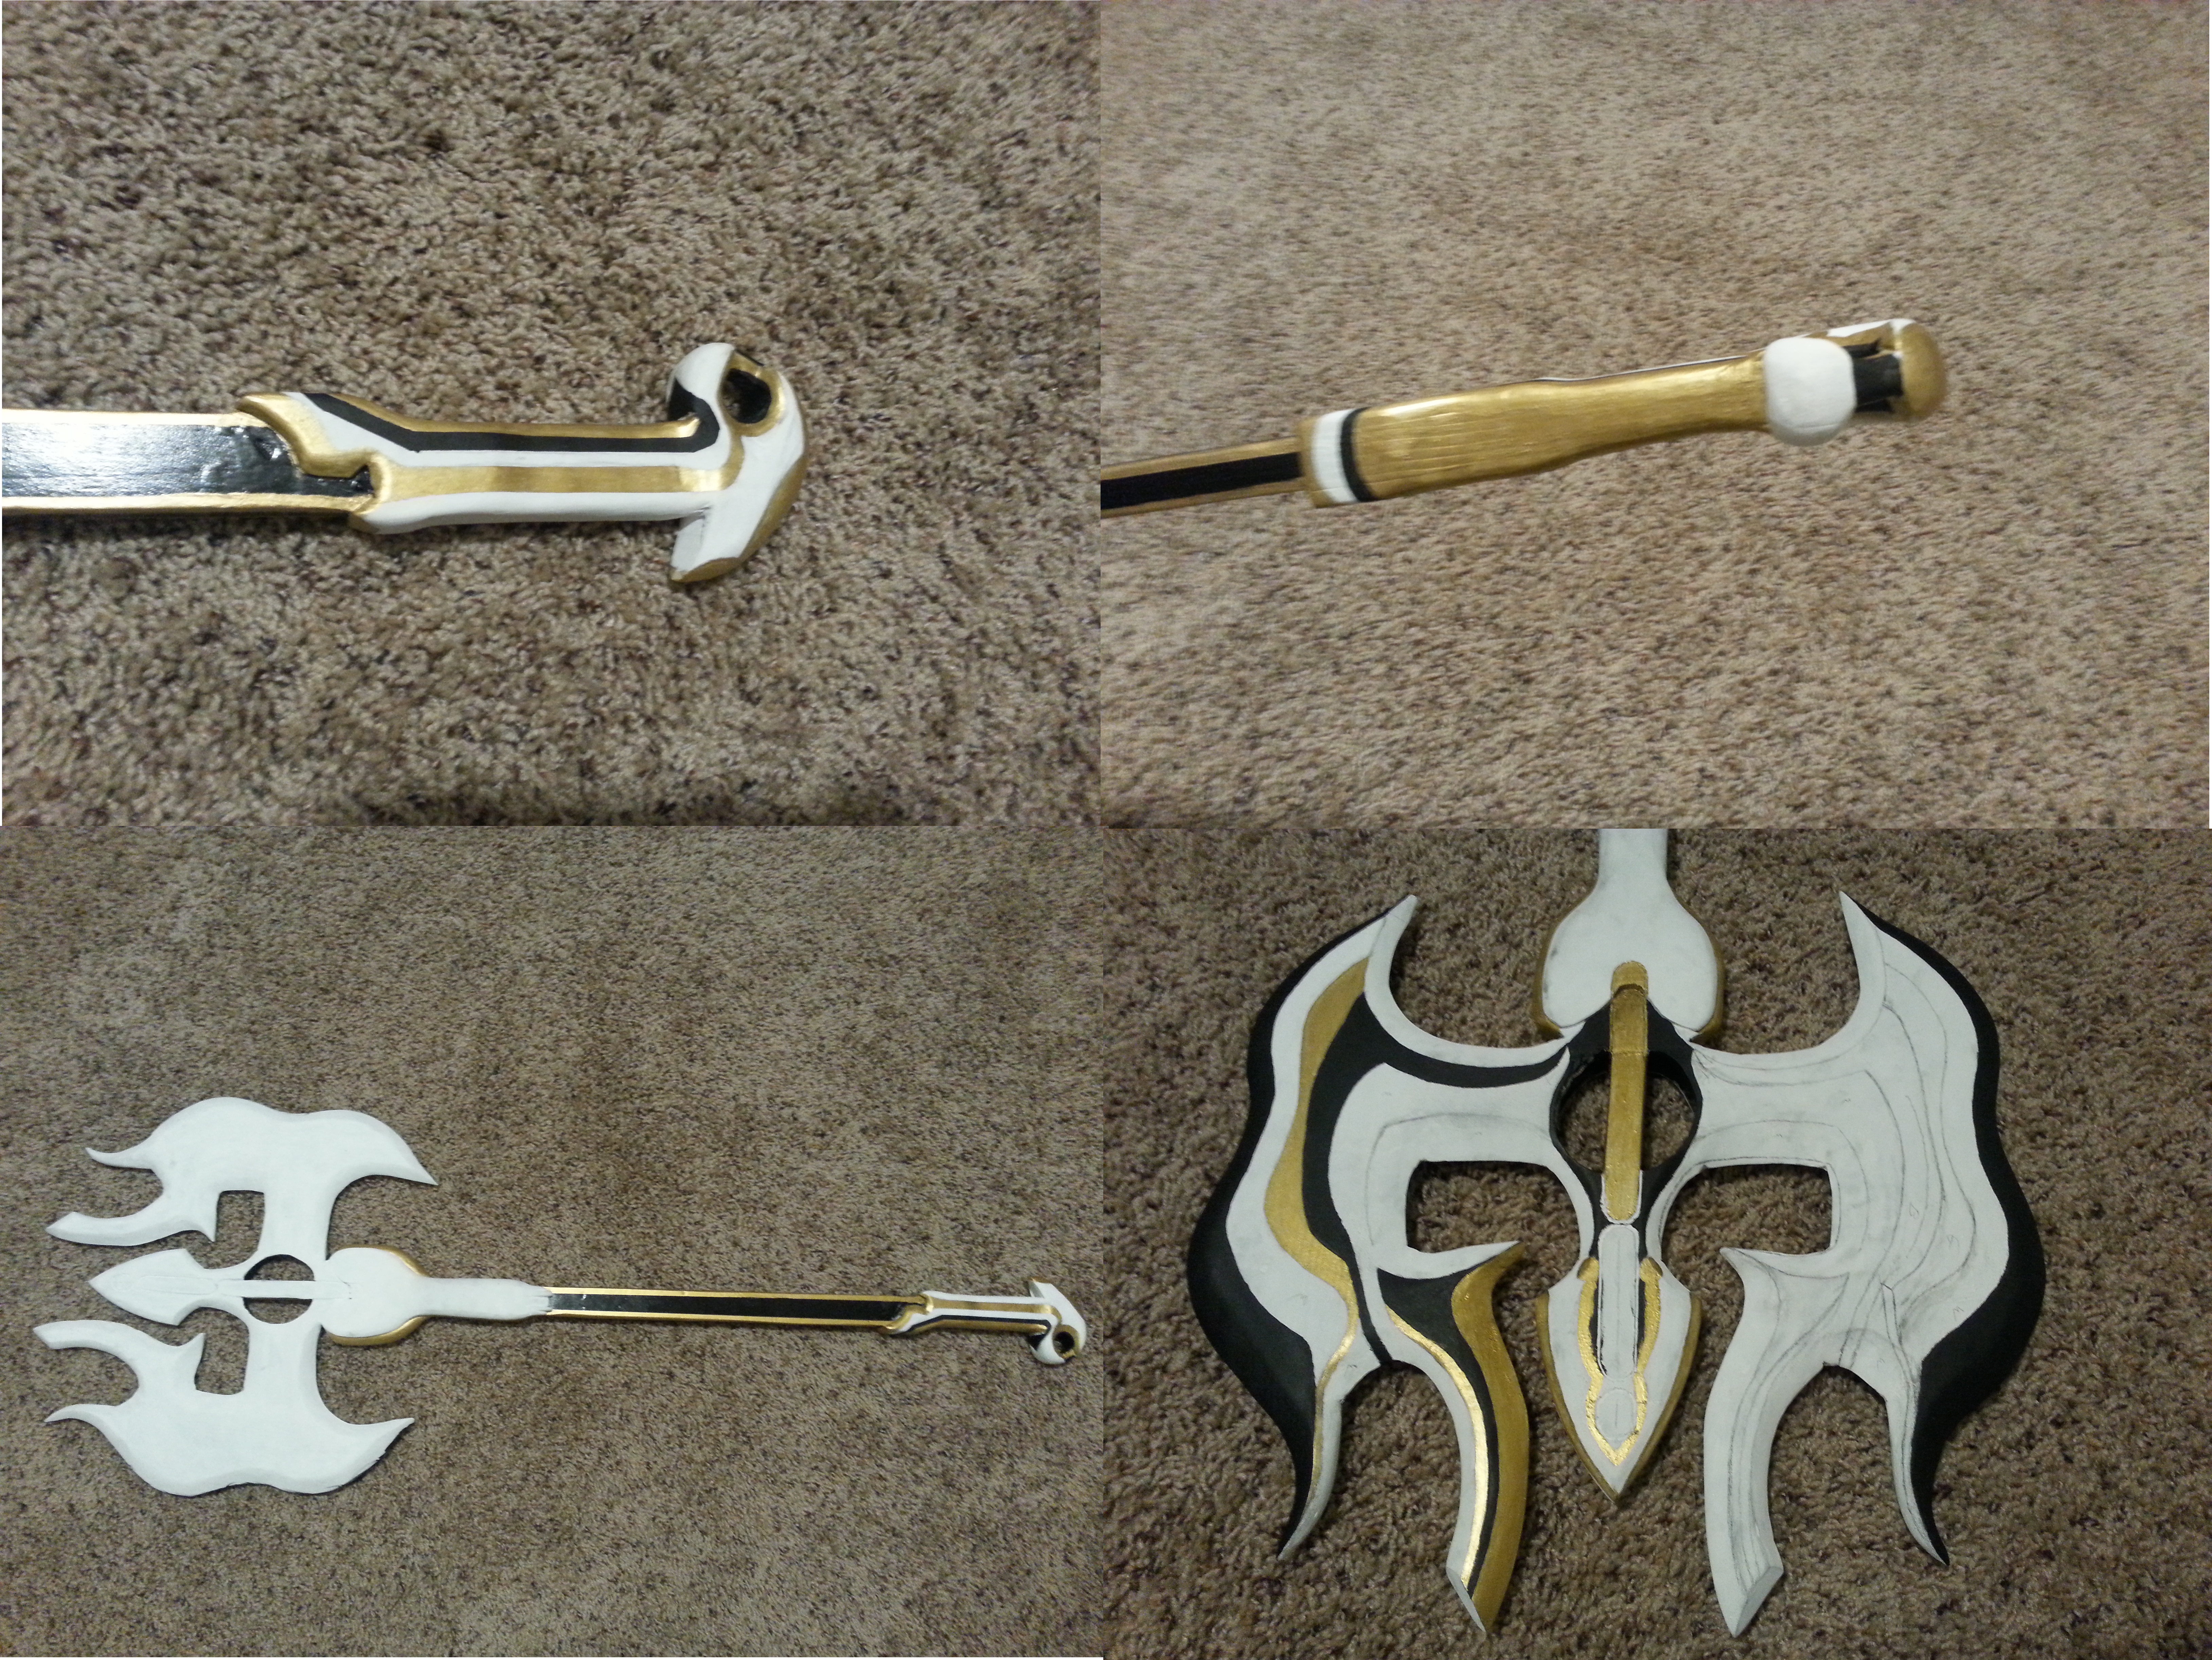
It's nearly done! All that remains is paint. Sounds easy, right? Well.... not so much. The painting itself is easy, but this stage is very time consuming, and I do not have as much time as I used to. Between obligations in games to maintain membership, or help out friends, or real world events, or work.. I was simply too busy to spend 3-4 hours at a time painting a weapon. I was able to make progress on it gradually, however, and though it took longer than expected, it did eventually get finished. Now, on to the process..First, I checked the job I did sanding the piece to make sure it was smooth enough for paint. It wasn't perfect, but there wasn't much I was going to be able to do to make it better, so I decided to proceed. I was originally going to start with a base coat of white, but I did not have a can of white spray paint, and I needed a base coat of something glossy to smooth out the surface and hide the wood grain / texture. This was done with a can of black glossy spray paint (Rustoleum), which did the trick nicely. Unfortunately, I found that with a glossy finish, comes the inability to draw on it with a pencil. This means, I was unable to draw the boundaries for the different paint color areas, and I had to alter the base coat once more. Since white was the color there would be the most of, I decided to repaint the head of the axe with flat white acrylic paint. This took at least 5 coats of paint to actually hide the black underneath it, but when it was done I was able to sketch the patterns as I needed to.
All my patterns, in every case, are hand drawn. This is a quick, and generally quite effective method for getting a good pattern, but it can have a few drawbacks. Using this method, meant that since I had no pattern to speak of, it would be next to impossible to get everything symmetrical. I did what I could to make them the same, but if you look very closely you can tell they are very slightly off.
I began painting the colors (after sketching the boundaries) on one side of the head to get an idea of what it would look like. The paint colors I had worked out well in the sample I tested early on, and they lived up to that promise on the weapon. It looked good, so I decided to continue on with the painting.
I tried using things like painters tape for straighter lines, but I very quickly found that it was a terrible idea, as it took far too long to get the tape cut to the correct shape, it wouldn't stay stuck down well enough, and was generally a mess, as I had to leave it on for the multiple coats of paint it took, and that meant the tape got stuck to the paint and would sometimes peel off flakes of it.
Fun fact.. each color (if you don't count the time between work periods, and excluding the blue paint) took me an average of 4-5 hours to get painted. The white took at least twice that long, as it needed so many coats. This means that I spent about 18-20 hours just adding paint to this weapon.
Anyway, I had fun working on this while I was building it, and I'm very happy with how it turned out. The weapon will likely not be built again, due to the time required. However, if I ever do decide to rebuild it, I will probably use metal instead of wood.
I'll post a couple of pictures of the finished weapon after this, so enjoy, and thank you all for your patience!
 (Smile)")
- Deviation Anonymous


