HOME | DD
 o4311 — University Profile Picture Evolution
#adobe #adobeillustrator #design #illustrator #profilepicture #selfportrait
Published: 2021-01-11 13:25:35 +0000 UTC; Views: 2491; Favourites: 1; Downloads: 0
Redirect to original
Description
Despite that I have homework to do but believe one of them is time-wasting, the other I cannot get the group to come together, and another is overwhelmingly large thanks to the amount of work I produced, I got bored and decided to play with Adobe Illustrator because all, if not most, of my university work are done with Adobe Illustrator, Photoshop, and InDesign.I saw a post where it said that Krita is a free alternative to the mentioned programs above... which is funny since I use Krita to do a lot of freehand drawing and 2D animation. Translation between programs can be a hassle and I only ever use my graphics tablet for Krita but I guess it makes sense how I was learning and progressing really fast, almost matching the speed of the course.
Since it is the new year and new term, I thought about changing my profile picture as I just like to have unique things for everything hehe. I love customization and I dislike using the same thing over and over again (i.e. repeating make-up looks, using the same picture for other profiles, using the same theme on other things etc.) so I wanted to create something similar to my current and favourite profile picture using the solarize effect on PicsArt to choose my colour palette.
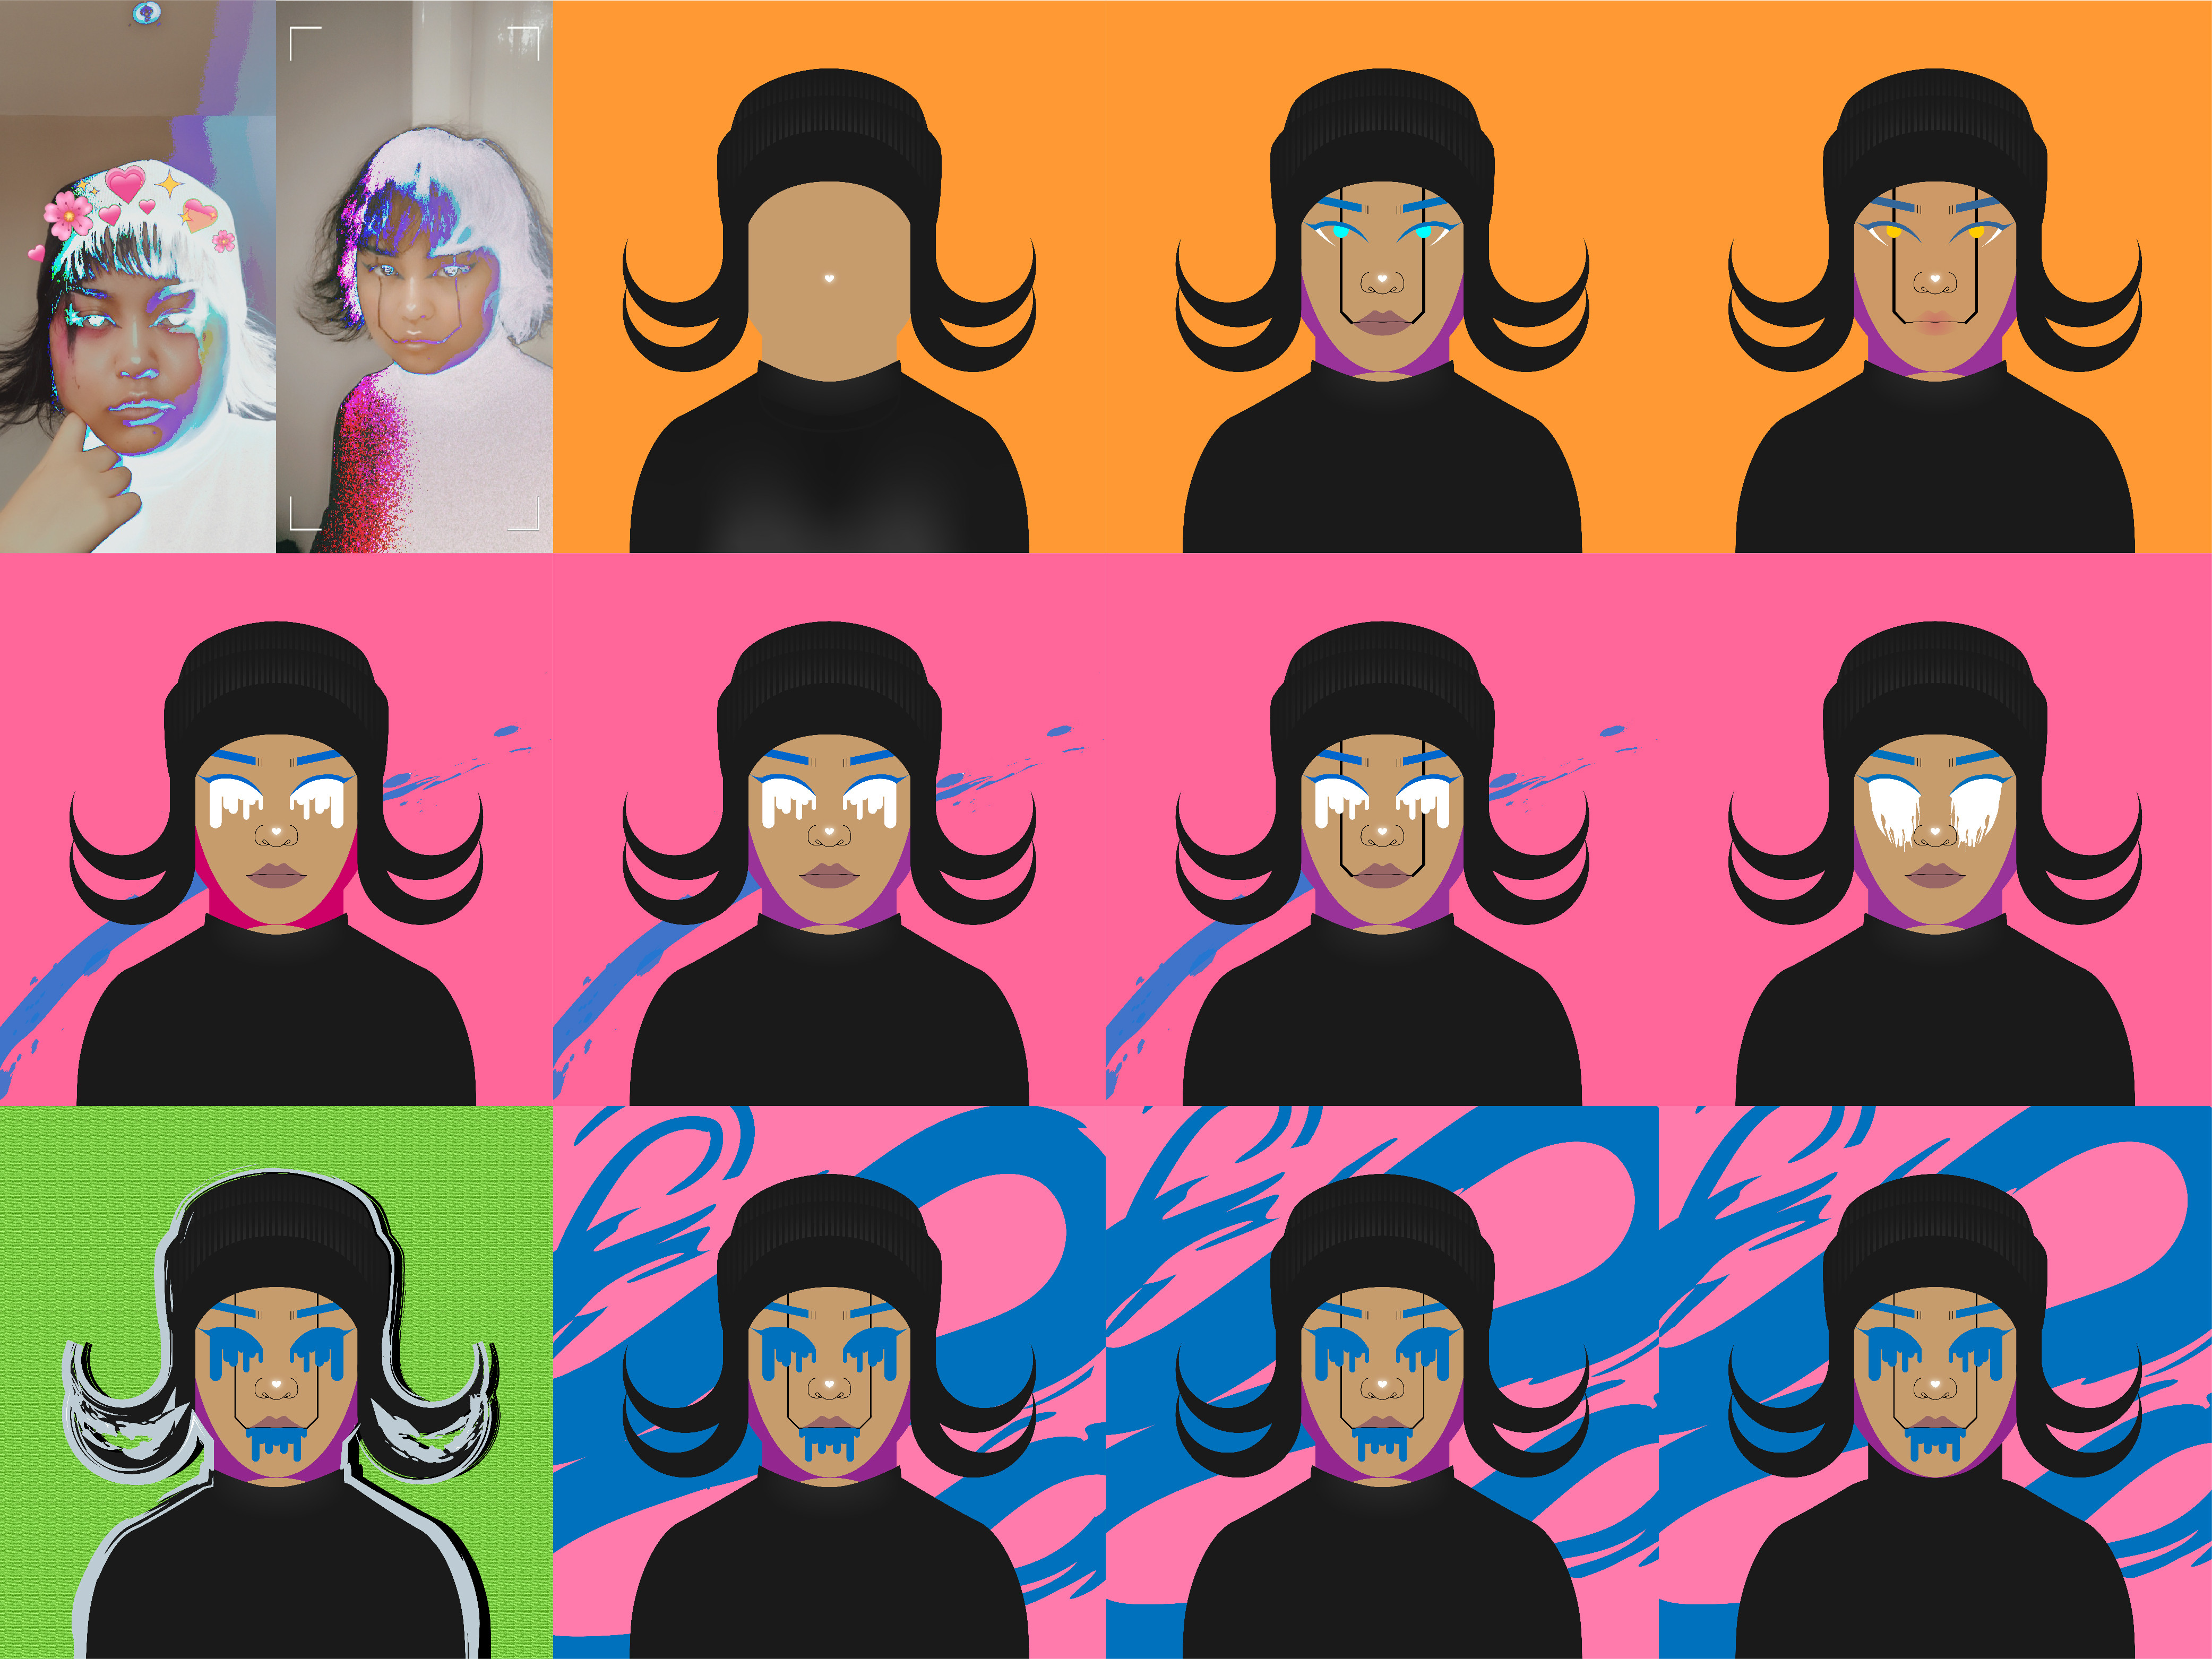
Through evolution, I basically picked bits of what I liked and morphed them together I try to branch and experiment a little until I reached my desired outcome! The top left are pictures of me edited via PicsArt, that's what I used for references and then just traced and created vector images myself (which was tricky because the smart guides were attaching to EVERYTHING). I'm sure I've stated somewhere that... well, I guess I do come off as edgy, I'm not meaning to intentionally be edgy, though. I just like the art and aesthetic of violent nature. I like distortion, I like... hmm. In this case of 22 students (perhaps more due to late transfers) and 2+ professors, I just wanted to stand out a bit more... as if I don't stand out enough. I had the idea for simplicity but one would know very well that isn't going to happen with me since I love detail and performing tricky manoeuvres.
I learned a lot of things through playing around and experimenting with tools and features Adobe Illustrator had to offer. For example, I realised that I had to no longer dissect vector and individually delete every unwanted when I can just use the compound path(?) (sorry, I don't remember the proper name but it shares similar functionality to a similar feature in 2D-Design, a CAD software fitted for machinery like laser-cutting) and drag to form the desired shape.
The one thing that I love Krita for and absolutely hate in Adobe Illustrator is mirrors and reflection. In Adobe, you must reflect and then unite or merge if you would like a symmetrical image (like I did all the way through designing my profile picture except for the background) but Krita has a feature to add horizontal and vertical mirror lines and you can adjust them to any position! If only there was a way to somehow combine the mirror feature of Krita and vectoring in Adobe Illustrator so that you can adjust BOTH anchors, curves or whatever. PLEASE, that would be a DREAM.
The only minor change that cannot be seen here is Adobe Illustrator keeps CRYING about colour correction so I had to play around with that but since this isn't for print or commercial use, it didn't matter. I played to see what difference it would make but... eh, I'm sure I'll learn about it later or maybe I just didn't listen about it lol.
Since the new term has started, I'm afraid there won't be time dedicated to Krita, not for a long time even in lockdown. I don't use Krita for university unless I'm doing 2D freehand animation but otherwise, nada. I will be putting my heart and effort into other projects, though. I swear at some point I will provide images of my projects with instructions and information about it - materials, colour, waste and recycle, design & design transfer etc.
Oh yeah, university doesn't have a lot of rules on being professional. I never come in dressed professionally and I'm not professional myself, I don't even act professional. Not saying I'm rude, I'm just friendly and respectful.
May or may not have messed up the order of this evolution and I cannot be bothered to fix it as I have to do my homework now lol but the order is;
Reference Pictures, Version 1.1, Version 1.2 (the initial design), Version 1.3
Version 2.3 (I think), Version 2.2 (I think), Version 2.4, Version 2.1
Version 3.1, Version 4.1, Version 4.2, Final Outcome (Final Design)
In order to practise my justification analysis because I always forget to do it for one of my modules, I will explain my artistic choices;
The final design fitted me better as a person. I have a lot of interests and hobbies, the most that stands out for my art is the aesthetic of violent nature. Though I adore Realistic and Classic genres, my style leans towards Futurism as well as graffiti and comic styles. I do my best to be unique as I am comfortable with being myself so I try to think outside the box by swapping colours and experimenting. Everything is art for me and with art, you can create illusions as there's no filter and anything can be used for everything. It can be shown in simple ways such as blood is normally red, why not have blue blood? As I like a lot of cyber themes, blue blood is seen as an android's blood portrayed the videogame that I dearly love, Detroit: Become Human. My favourite colour is also pink and pink is the opposite colour of blue which gives a complimentary contrast. My starting background will always be orange as I believe it's a good contrast to almost every colour and it makes it easier to see everything for me. I switched to green and grey as I wanted to go for colours that don't usually pair together but in the end, blue and pink are my favourite colours (especially cyan and magenta but I didn't plan on using bold colours here). I combined some of my favourite looks (although not shown in the referencing) and picked the one that I think would look great on my profile picture and I enjoyed doing as well as feeling confident in. I also like how the blue swirl in the background almost looks like a dragon even though my intention was to mimic blood splatter.
I wear black a lot. In fact, that's all I ever wear except for at home and in Thailand. Closely, one can see that I added some details such as gradients and I learned there is a feature that allows you to draw inside the shape! Which is super nifty since I went through 10 weeks of using the pathfinder window and making an absolute mess with layers and groups. I wanted to separate the colours a little bit so they weren't all in one piece and to distinguish the line between my hair and the beanie. I did make my own free gradient but decided to get rid of it as too much details would make the art style disorganised (aiming for distinct simplicity). I kept everything symmetrical so I can centre the image as I have also learned that I can simply click to arrange to artboard or selection rather than moving around and making my own guides. I think it looked better symmetrical, I wanted my profile picture to be symmetrical anyway.


