HOME | DD
 PeekingBoo — Time Lapse: Drawing and Animating DJ Skitty

Published: 2013-04-14 18:07:40 +0000 UTC; Views: 1592; Favourites: 23; Downloads: 0
Redirect to original
Description
Click Here to watch the VideoI don't know how to place youtube videos as the main image on here so this will do until someone tells me how, hahaha.
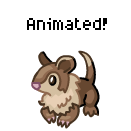
This video shows just about the entire process of how to animate DJ Skitty seen below:
Be sure to view the description as it highlights on the following details:
0:00 = Draw basic shapes on separate layers
0:15 = Create a palette (big head on the right) and start colouring main areas
0:40 = Imagine your light source and add simple shading where necessary
1:20 = Once initial design is complete, add features
1:57 = Create a classic tween across all layers and make a keyframe on frames 1, 5, 9, 13 and 17. Select every layered frame on Frame 1, 9 & 17 and change its ease to 100, do the same for frame 5 and 13, but make its ease -100 instead. This means that frame 1 leading to frame 5 will tween fast and then slow down, then from frame 5 to frame 9 it will start slow and speed up, giving you a nice flowing effect (Skitty was a little more complicated so I doubled up in places resulting in 34 frames, but the basic principle is the same).
Frames 5 and 13 are the only ones you need to change because the other frames act as return points, ideally you would make Frame 5 have the character moving left and Frame 13 have the character moving right. Since frame 1, 9 and 17 would always be the same it would always look like the character is returning to its initial point, thus completing the loop.
2:30 = Draw and animate the deck using same process mentioned above
3:50 = Use masking to make parts of the character to appear in front of the deck, and some parts to appear behind
4:15 = Throw your entire animation into a single symbol (make sure it still animates in your timeline), then in a lower layer copy that symbol, CTRL+SHIFT+V to paste at the same coordinates, tint it completely black then move it up 3 pixels, repeat the process for Left, Down, Right, Up/Left, Up/Right, Down/Left, Down/Right until you have a thin border surrounding your original animation. When satisfied tint them all white instead. The reason for this is because GIF animations look jagged around the edges if the background is transparent, by having the border white it will blend in with most bright webpages and so you won't see that jagged look, meanwhile the lines within the border will be completely preserved
4:20 = Make some finishing touches, I realised I had forgotten to animate the disc and the music note on the screen
The whole process above took me about 2-hours because I had to go back and change a few things for the person who requested this piece, the first one I ever did took about 4-hours so it really comes down to how familiar you are with the software and how complicated the thing you're drawing is.
Related content
Comments: 3

Brilliant!
I think I'm going to start doing stuff like this.
👍: 0 ⏩: 0


