HOME | DD
 silverjow — Tutorial - Skin tone
#skintone #tutorial #silverjow #color
Published: 2015-07-29 08:36:47 +0000 UTC; Views: 199456; Favourites: 3630; Downloads: 2788
Redirect to original
Description
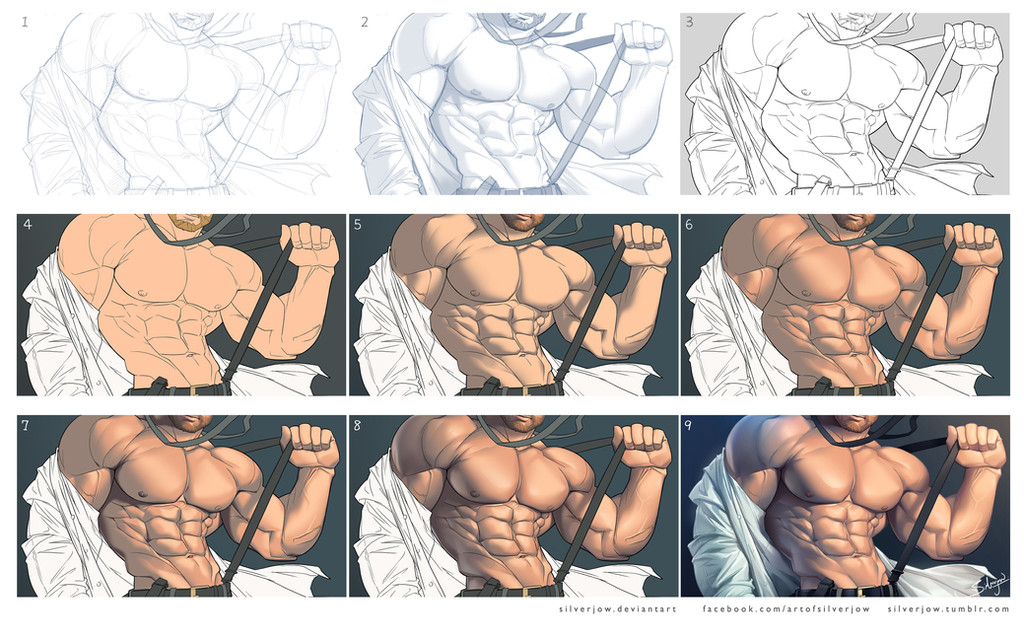
I received a lot of questions asking about my rendering technique, and requested by some of you to make a tutorial. So here you go, a simple tutorial on how I render skintone.
1. Start with rough sketch.
2. Going to detail. I like to experiment with basic shading at this stage, to design lighting and make sure the value, space and perspective is correct.
3. Create new layer, draw the OUTLINE by using Wacom tablet and default brush tool in Photoshop. Fluid thin to thick line can be created with pen pressure.
4. Fill in the body with neutral skin color under the outline layer.
5. Pick a darker tone of the skin, create a new layer on top of neutral skin color and apply SHADOW by using airbrush.
6. Create new layer between neutral skin tone and shadow, apply MIDTONE shading.
7. Create another layer on top of shadow, apply CORE SHADOW with darker tone.
8. Apply HIGHLIGHT on a new layer between neutral skin tone and midtone. Lock transparent pixel for each shading layer, adjust color value with airbrush and gradient tool.
Create a new layer(how many layers already?) on top of core shadow, specify the blending mode for the layer to screen/overlay, and apply reflected light. Reflected light is optional, but it helps enhance 3d effect of the subject.
9. Final touches: Adjust outline color to match skin color. Change overall color and level with adjustment layer. Add minor details like backlight and texture if needed.
And here we have it! Hope you guys like it!
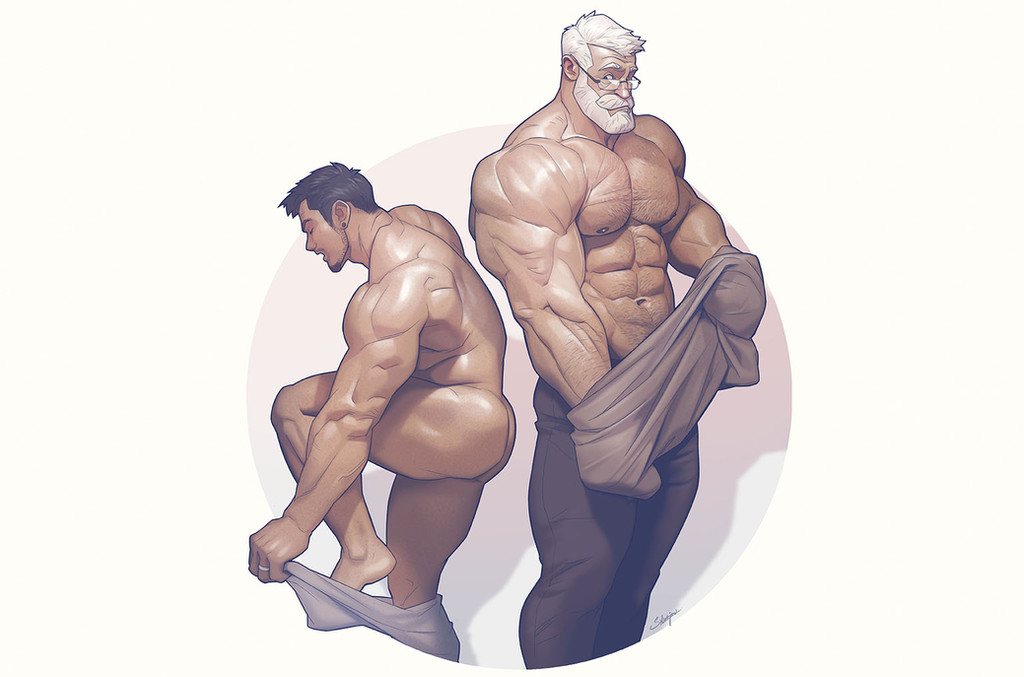
Final Artwork:
Related content


Comments: 60


Seriously, Silver. Step 2 is already advanced shading.
I'm not good at CG style shading. So, this is gonna be very helpful.
I use SAI though... but I think I can still do this with SAI.
")
👍: 0 ⏩: 0

It's very useful, thanx Joe! Just not sure if I'm able to use them all....
👍: 0 ⏩: 0

Thanks Joe, Nice tutorial!! It seems so simple but it's not...  (Smile)")
Alex
👍: 0 ⏩: 0

It's fantastic! Will help me out for some practice. What areas do you normally thicken when doing the like work? You should do a tutorial on the hair.
👍: 0 ⏩: 0


<= Prev |