HOME | DD
 SimplySilent — PE: A Guide to Gallery CSS
Published: 2013-07-04 16:35:53 +0000 UTC; Views: 51482; Favourites: 1328; Downloads: 0
Redirect to original
Description
body div#devskin10422895 .code { background:#eaf4e9; padding:15px; font-family:'Courier New'; margin:0 5%; } body div#devskin10422895 h1 { font-weight:bold; } body div#devskin10422895 h2 { font-weight:normal; } body div#devskin10422895 .text h2 { color:#B73E62; font-size:20px; font-weight:bold; } body div#devskin10422895 .gr-box { overflow:visible; background:transparent; margin:190px auto 0px auto; position:relative; padding:0px 10px 10px 10px; } body div#devskin10422895 .gr-top { display:none; } body div#devskin10422895 .gr-top .gr { display:none; } body div#devskin10422895 .gr-top h2 img { display:none; } body div#devskin10422895 .gr-top h2 { display:none; } body div#devskin10422895 .gr-body { background:#dae4d9 url(https://fc06.deviantart.net/fs71/o/2013/024/2/b/350289350_646739_322748439_464982_bggrad.png) 0px 0px repeat-x; border:1px solid #a6b2a6; overflow:visible; color:#5d625d; line-height:20px; padding:30px 0px 0px 0px; border-radius:6px; -moz-border-radius:6px; -webkit-border-radius:6px; border-radius:6px; -moz-border-radius:6px; -webkit-border-radius:6px; box-shadow:0px 1px 5px #8c9688; -moz-box-shadow:0px 1px 5px #8c9688; -webkit-box-shadow:0px 1px 5px #8c9688; box-shadow:0px 1px 5px #8c9688; -moz-box-shadow:0px 1px 5px #8c9688; -webkit-box-shadow:0px 1px 5px #8c9688; margin:0 5%; } body div#devskin10422895 .gr { background:transparent; border:none; } body div#devskin10422895 .gr-body .gr { padding:0px 20px 0px 20px; } body div#devskin10422895 .gr-body .gr .text { padding:10px 0px 0px 0px; } body div#devskin10422895 i.tri { display:none; } body div#devskin10422895 i.gr1 { display:none; } body div#devskin10422895 i.gr2 { display:none; } body div#devskin10422895 i.gr3 { display:none; } body div#devskin10422895 i.gb { display:none; } body div#devskin10422895 .top { position:absolute; top:-174px; left:0px; right:0px; width:100%; text-align:center; z-index:50; } body div#devskin10422895 .top img { margin:0px auto; min-width:529px; } body div#devskin10422895 div.board { width:360px; height:217px; background:url(https://fc03.deviantart.net/fs71/o/2013/024/d/d/350289350_646740_322748439_464983_pinboard.png) top right no-repeat; text-align:center; z-index:99; margin:-50px auto 0px auto; position:relative; } body div#devskin10422895 div.board .shadow-holder { float:left; top:0px!imporant; left:0px!important; } body div#devskin10422895 div.board img.avatar { position:absolute !important; display:block; margin:0px 0px 0px 0px; bottom:-18px; right:-75px; } body div#devskin10422895 span.board { display:none; } body div#devskin10422895 div.board .stamp { position:relative !important; left:20px; top:50px; } body div#devskin10422895 div.board .stamp img { box-shadow:0px 1px 5px #4d1e1c; -moz-box-shadow:0px 1px 5px #4d1e1c; -webkit-box-shadow:0px 1px 5px #4d1e1c; box-shadow:0px 1px 5px #4d1e1c; -moz-box-shadow:0px 1px 5px #4d1e1c; -webkit-box-shadow:0px 1px 5px #4d1e1c; } body div#devskin10422895 div.board .gallery { position:relative !important; right:78px; top:80px; color:#fff !important; font-size:20px; font-weight:bold; text-align:right; width:325px !important; text-shadow:#4d1e1c 0px 1px 3px; } body div#devskin10422895 div.board a { color:#fff !important; font-size:20px; font-weight:bold; } body div#devskin10422895 a { color:#B73E62; text-decoration:none; } body div#devskin10422895 a:hover { color:#E43A5D; text-decoration:none; } body div#devskin10422895 ul { margin:0px 0px 0px 0px!important; } body div#devskin10422895 ul li { list-style-image:url('https://fc05.deviantart.net/fs71/o/2013/024/6/0/350289350_646741_322748439_464984_bullet.gif')!important; } body div#devskin10422895 li b { font-weight:bold; } body div#devskin10422895 li b sup { font-size:10px; font-weight:normal; } body div#devskin10422895 .list { display:none!important; } body div#devskin10422895 .bottom { position:absolute; right:6px; bottom:6px; color:#DAE4D9!important; z-index:99; padding:0px 0px 0px 0px!important; height:27px; font-size:0px; } body div#devskin10422895 .bottom .commentslink { font-size:0px; background:url(https://fc02.deviantart.net/fs70/o/2013/024/8/d/350289350_646742_322748439_464985_comment.png) top no-repeat; color:#DAE4D9!important; text-decoration:none!important; padding:0px; margin:0px 15px 0px 10px; text-align:center; width:24px!important; height:24px!important; display:block; } body div#devskin10422895 .clear_ { clear:both!important; } body div#devskin10422895 .week { background:url(https://fc08.deviantart.net/fs71/o/2013/024/c/c/350289350_646743_322748439_464986_sepdots.gif) bottom repeat-x; padding:0px 0px 0px 80px; margin-top:-22px; } body div#devskin10422895 .week .cal { background:url(https://fc02.deviantart.net/fs71/o/2013/024/7/b/350289350_646744_322748439_464987_cal.png) top no-repeat; width:76px; height:38px; float:left; margin:0px 0px 0px -80px; text-align:center; color:#f2fbf0; text-shadow:#8c9688 0px 1px 2px; } body div#devskin10422895 .week .left { position:relative !important; left:3px; top:-6px; float:left; margin:0px!important; font-size:17px; font-weight:bold; width:30px; height:30px; } body div#devskin10422895 .week .left b { color:#96a791!important; font-size:8px; line-height:14px; text-shadow:#fff 0px 1px 0px!important; } body div#devskin10422895 .week .right { float:right; position:relative !important; left:-3px; top:-26px; margin:0px!important; font-size:17px; font-weight:bold; width:30px; height:30px; } body div#devskin10422895 .week .right b { color:#96a791!important; font-size:8px; line-height:14px; text-shadow:#fff 0px 1px 0px!important; } body div#devskin10422895 .header { font-size:24px; margin-top:-12px; font-weight:bold; font-family:Trebuchet, Tahoma, Arial, sans-serif; padding:0px 0px 0px 5px; color:#B73E62; text-shadow:#fff 0px 1px 0px!important; } body div#devskin10422895 .links { float:right; position:relative; bottom:20px; right:0px; } body div#devskin10422895 .links img { padding-left:8px; } body div#devskin10422895 .buttons { position:absolute; left:20px; bottom:6px; color:#DAE4D9!important; z-index:99; padding:0px 0px 0px 0px!important; height:27px; font-size:0px; } body div#devskin10422895 .buttons img { padding-right:8px; }
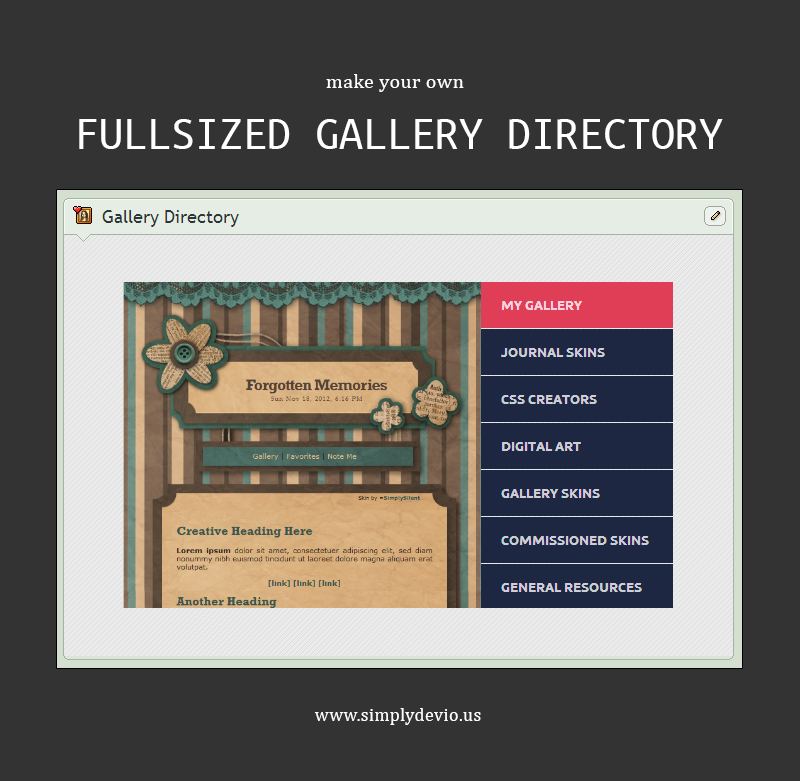
A Guide to Gallery CSS
Learn the basics of Gallery CSS with this easy-to-follow guide!

In this tutorial, we'll cover:
Adding Gallery CSS
First of all, some important facts about Gallery Skins:
- Only Premium Members are allowed to add CSS to their galleries
- Skins can be added to both the Gallery and the Favorites
- Skins can only be added to the Gallery folders and Favorites collections (shown in the sidebar) but not the main page itself
Step 1: Click on one of your Gallery or Favorites folders in the sidebar.
Step 2: Click the button called "Folder Options" or "Collection Options."
This button is located at the top right of the gallery.
Step 3: Click on the blue "CSS" link at the top of the box.
Then click on the link called "Add CSS..." and then click the "OK" button on the pop-up box. You'll end up with a white text box like the one shown below.
Step 4: Paste your CSS into the box and click "OK" to save.
Your CSS will automatically be added to the folder.
Coding Your Own Gallery Skins
Step 1: Understand the basic layout.
In this tutorial, we'll focus only on the three main parts of the gallery layout: the body, the folder title, and the description. Now don't worry, I promise that it'll be easier than you think! In the pop-up box that you get after you click "Folder Options" or "Collection Options," you are shown several options.
- Name: Folder Title
- Text: Description
- Text Placement: Where your description goes. See the images below to see how these two formats look:
Here's what you get if you select "Left" for your text-placement:
And here's what you get if you select "Right" for your text-placement:
Please note how I have color-coded the three different parts of a gallery layout.
- body (blue) covers the entire gallery folder
- h2 (pink) contains the folder title
- .description (yellow) contains the folder description
In this tutorial, we'll be working with the Left format, since that is the default option.
Step 2: Changing backgrounds and text colorsThe first thing you'll probably want to do is change the colors of the backgrounds and text. Here's the basic format you can copy and edit:
body{
background:#color ; }
h2{
background:#color ;
color:#color ; }
.description{
background:#color ;
color:#color ; }
For example, say I wanted a light gray background (#f1f1f1 ) for the body with a dark blue background for the folder title (h2) and description (#213457). I would type the following code into the CSS text box:
body{
background:#f1f1f1 ;}
h2{
background:#213457;
color:#fff ;}
.description{
background:#213457;
color:#fff ;}
The result would look like this:
Step 3: Changing margins and padding
Notice how the formatting looks rather ugly in the preview above. There's a gap that I don't like above and to the left of the title, and the title is jammed right above to the image thumbs. The text of the title and description also look quite cramped, making them a bit difficult to read. But no worries, we'll fix those up nicely with margins and paddings!

In the paragraph above, I complained about the gaps around the title box (h2). Since that is outside of the box, we'll be dealing with margin. I want less of a gap at the top and the left, while I want more of a gap at the bottom. In CSS talk, this translates to:
margin-top: -15px;
margin-left: -15px;
margin-bottom: 30px;
or, if you are more experienced, you can condense the above into just one simple line 
margin: -15px 0px 30px -15px;
Now, I also didn't like how the text looked cramped in the title and description. Since this is inside the box, we'll work with padding.
For the title (h2), I want a padding of 30px all around, while for the description, I want a padding of 20px all around. In CSS talk, this would be:
padding: 30px;
and
padding: 20px;
Since we added padding to the description, this makes it become too large and start to squeeze into the image thumbs. To fix this, I'll limit the size of the description to a smaller size of 160px by adding:
width: 160px;
Now we get this much prettier result:
Putting it all together, the code looks like this:
body{
background: #f1f1f1 ;}
h2{
background: #213457;
color: #fff ;
margin: -15px 0px 30px -15px;
padding: 30px;}
.description{
background: #213457;
color: #fff ;
padding: 20px;
width: 160px;}
Step 4: Experiment!
For those who are more experienced with CSS, here are just a few of many elements you can use:
- .folderview-art {} contains all the image thumbs
- .tt-w {} contains the thumb, title, comments, and artist
- .thumb {} formats the image thumbs
- .details {} contains the title, comments, and artist
- .details .t {} formats the thumb title
- .details .u {} formats the artist
- .commentcount {} formats comments
Adding Background Images:
If you prefer patterns or textures instead of solid blocks of color, then you can add background images with this code:
background: url('INSERT IMAGE LINK HERE');
For those with more experience with CSS, you can also work with background color, background repeat, and background position. You can combine all these into one line like so:
background: #color url('INSERT IMAGE LINK HERE') no-repeat top;
To learn about all of the different options you can use, I suggest reading about backgrounds on www.w3schools.com
Some Useful Resources
Tutorials/Layouts:
- How to download and use gallery skins: How to Use Gallery Skins by xXSnowDreamXx
- Some useful basics for understanding CSS: PE: The Gate to CSS by PizzaPotatoNBacon
- Some more elements you can use: DeviantART Gallery CSS Explanation by toonham
- An installable code snippet resource for styling thumbs: Multi Thumbstyles CSS Template by gillianivyart
- A walkthrough of coding a gallery skin: Walkthrough Gallery Template by GinkgoWerkstatt
Gallery Skins:
Browse through Gallery Skins on deviantART.
Groups:
Related content


Comments: 240

.details .t {
color: #fff ;
}
This will change the titles to be white, I hope it helps uwu
👍: 0 ⏩: 0

I'm having trouble using the 'text-placement' command. I got my background image for the description in the right place and now I'm trying to move the text out of the way. I evidently don't have it in the right place, because dA isn't accepting the code.
Here's what I have written down, is there anything you'd suggest to fix the problem?
👍: 0 ⏩: 0

why can't i seem to change the folder title font with
h2{
font-family: "Book Antiqua", Georgia, Serif;
}
works for all the other text >~<
👍: 0 ⏩: 1

I think the folder title is h1. c:
👍: 0 ⏩: 1

question can you use Adobe Muse css code for da ?
👍: 0 ⏩: 1

Err, maybe? I'm not familiar with Adobe Muse, but CSS is CSS wherever you go. The only difference are the selectors that you want to style. For example, DA has specific elements that make up the thumbnail displays that you'd have to use, but the essential CSS is always the same.
👍: 0 ⏩: 0

Thanks, this was easy enough. You explained it perfectly
👍: 0 ⏩: 0

Thank you so much for this! This is helping me to understand the whole thing so much better!
👍: 0 ⏩: 0

Um excuse me, but I don't see that button in my gallery/favorites page.
So....... I am like -.-
👍: 0 ⏩: 0

Where do we place this code background: #color url('INSERT IMAGE LINK HERE') no-repeat top; because when I place it on the very begginign of the css code it wont work.
👍: 0 ⏩: 0

Thank you for this!!!!!
👍: 0 ⏩: 0

I'm not sure if this is just me, but gallery CSS seems to have stopped working? Any sort of CSS on gallery skins for both Gallery and Favorites have been disabled and image embedding/thumbs won't work in the description area either;; Do you think it's part of the thumbnail makeover dA is planning in the near future?
👍: 0 ⏩: 2
They're still working for me: simplysilent.deviantart.com/fa…
The gallery system is quite a bit different than what's in the journal, which is unfortunately rather outdated now. Skins still seem to be working though.
 (Smile)")
👍: 0 ⏩: 1
Ahh yeah, they seemed to have come back to normal after a few hours- I think it was a temporary bug, thank goodness :'D thanks for the reply, though!♡
👍: 0 ⏩: 0

Omg I thought I was the only one.
I tried to install a css template, it kept not working at all

👍: 0 ⏩: 1
Whew, so I guess it's not a problem on my side! It sucks for them to not work at all, doesn't it;; I hope whatever DA is planning to do for profiles/galleries in the near future is something worth all this trouble!
👍: 0 ⏩: 1
Yeah I'm reassured now that I'm not the only one too. xD
That kinda sucks yeah ><, I hope we'll got news soon though
👍: 0 ⏩: 0

For some reason I cannot get the Gallery title to change colors. I know the past I could, but recently nothing I have tried works. Did they change the coding or did start limiting what we can do with Galleries now?
👍: 0 ⏩: 1
Have you tried adding !important?
It's been a while since I've worked on gallery coding, so I can't be sure what the issue is. It might just be that we are limited.

👍: 0 ⏩: 1
Yeah I was able to change it before. I am thinking they have limited us.
👍: 0 ⏩: 0

I have a question, why in gallery Featured I can't change CSS?
👍: 0 ⏩: 1
Just a DA thing, I'm afraid.
👍: 0 ⏩: 0

Thank you so much this is extremely helpful!
except I can't figure out how to change the title to be blue like yours ono it just stays with a black font ;___;
👍: 0 ⏩: 0

Let's say I'm using this background:
This bg image doesn't cover the full body, and leaves the body behind the description the normal DA color (greenish-gray.) Is there a way to spread that image (the hearts) to behind the description? Or a way to fill the area behind the description with a color? If there's a specific way to code that, where would it go?
If you need the coding for the bg, lemme know. I can note you..
👍: 0 ⏩: 0

is this all up-to-date?
some things don't work
")
👍: 0 ⏩: 1
Ehh, might be a bit out of date. I think I fixed some of my own journal skins after a DA updated a while back, but this might not have made it.
I hope to someday go back and update all my tutorials, but I'm not sure when that'll happen.
👍: 0 ⏩: 0

I cant figure out how to put a background ;A;
I put the code in there, and replace the words, not the ' or ( and paste a background url.
Am I supposed to leave the Background colour? or am I supposed to remove it? D:
👍: 0 ⏩: 1

To add an image that's in your stash:
CSS Coding
body {
background-image: url("insertURLhere.lol");
}
Simply replacing ' with " may help. Make sure you're getting the right link for your picture location, try putting your picture in your Sta.sh if you haven't already.
HTML Coding
Add in
style="width:YYYpx;height:YYYpx"
to replace 'AAA' to define the size of your picture in pixels. replace 'YYY' with the size.
This is just from basic HTML coding. Sometimes DeviantArt doesn't like that though and wont display things correctly. If you have any troubles, don't be afraid to note me and I cant give you/explain other ways to do it too. Hope this helps!! d(0v0)b
Sorry for all the 'it may help' stuff. I haven't really gone all out with these codes on dA yet xD
👍: 0 ⏩: 1
You're welcome! ヾ(❀╹◡╹)ノ゙
👍: 0 ⏩: 0

very useful and informative!! thank you very much!!
👍: 0 ⏩: 0

hello loved the tutorial
which css code you used?
Step 4: Paste your CSS into the box and click "OK" to save.
👍: 0 ⏩: 0

Thank you so much for making this!
Do you have on for journal skin CSS?
👍: 0 ⏩: 0

Thank you so much for putting this together! It's really helpful.
👍: 0 ⏩: 0

Thanks so much, coming from a person who knows CSS for customization. this is very useful for customising my gallery and favourites. c:
👍: 0 ⏩: 0


Great and useful tutorial. I hope to put it to work right away.
One little thing -- those anchor links to the different sections of this post all lead to blank Sta.sh documents...
👍: 0 ⏩: 0

How do i make the gallery folder pic in general change?
👍: 0 ⏩: 0

What if I want to code a lit thumb in the description? I understand the basics of coding lit thumbs but how do I get to the ones within the description? I would at least like to take out the little blue journal icon. Thanks.
👍: 0 ⏩: 1
Just look in the +Add Media button where ever you can, find the emote you want and hover over it. for example, is : deviantart : without spaces.
As for taking the image OUT of a box, like the custom box paper icon and such, the only one I'm aware of that works like that is the Journal. Basically you have to just not code it into your journal CSS.
Here's a nice place to customize a journal and see how the changes affect the journal:
www.simplydevio.us/resources/b…
And it's made by SimplySilent too! \(0w0)/
👍: 0 ⏩: 0

This is SO helpful thank you ever so much for making this!
You have made mad scientist DA gallery CSS easy as pie! <3
(Also, I recommend adding other peoples problems and solutions
to your description, because I was having a few problems, but
by scrolling through others questions and answers, I got
everything to work out nwn)
👍: 0 ⏩: 0

I'm trying to figure out how to create translucent white boxes behind the thumb image/description with an opacity of 0.4
I pretty much got it, but the thumb image is translucent as well! I'm not sure how to fix this, could you please help? Thanks =^.^=
👍: 0 ⏩: 0

I have a couple questions for you pertaining to Gallery CSS. I'd like to know how to manipulate the previous and next buttons and the page number buttons in the gallery. I'd like to remove the buttons if at all possible and leave just the text.
Also, is there a way to recolor links? I've been having a hellish time with that.
Also is there anyway to incorporate the gallery subfolders into the CSS code?
👍: 0 ⏩: 1
1. Eurg, I'll have to go in a see the code again, as I never modify those. If you know how to Inspect Element (right click on the page and select Inspect Element) you can examine the HTML for those buttons yourself.
2. Only in Chrome. In firefox, DA's code overwrites anything you might try.
3. No, not that I know of.
")
👍: 0 ⏩: 1
1. Ooh thank you so much!
2. Yay, I use Chrome! Okay, how exactly do you do it?
👍: 0 ⏩: 0

I still don't know how to add the background image ): It keeps saying it's invalid.
👍: 0 ⏩: 1
This guide needs major overhauling, but this should still do the trick:
body{
background: url('IMAGE URL');
}
Make sure you're using the image url correctly.
👍: 0 ⏩: 1
wait but i did put the image url in the IMAGE URL section and it still pops out and says that it's invalid D:
👍: 0 ⏩: 1
| Next =>