HOME | DD
 sturkwurk — HyperZOOM Tutorial step 3
Published: 2009-05-13 23:41:31 +0000 UTC; Views: 1864; Favourites: 18; Downloads: 186
Redirect to original
Description
Making your ownHyperZOOM Background Image
Software used: Poser 7, PhotoShop 7
This will be one of two different Hyperzoom Styles.
I call it the “ZOOM UP” style, since it predominately features the ground and does not show any sky.
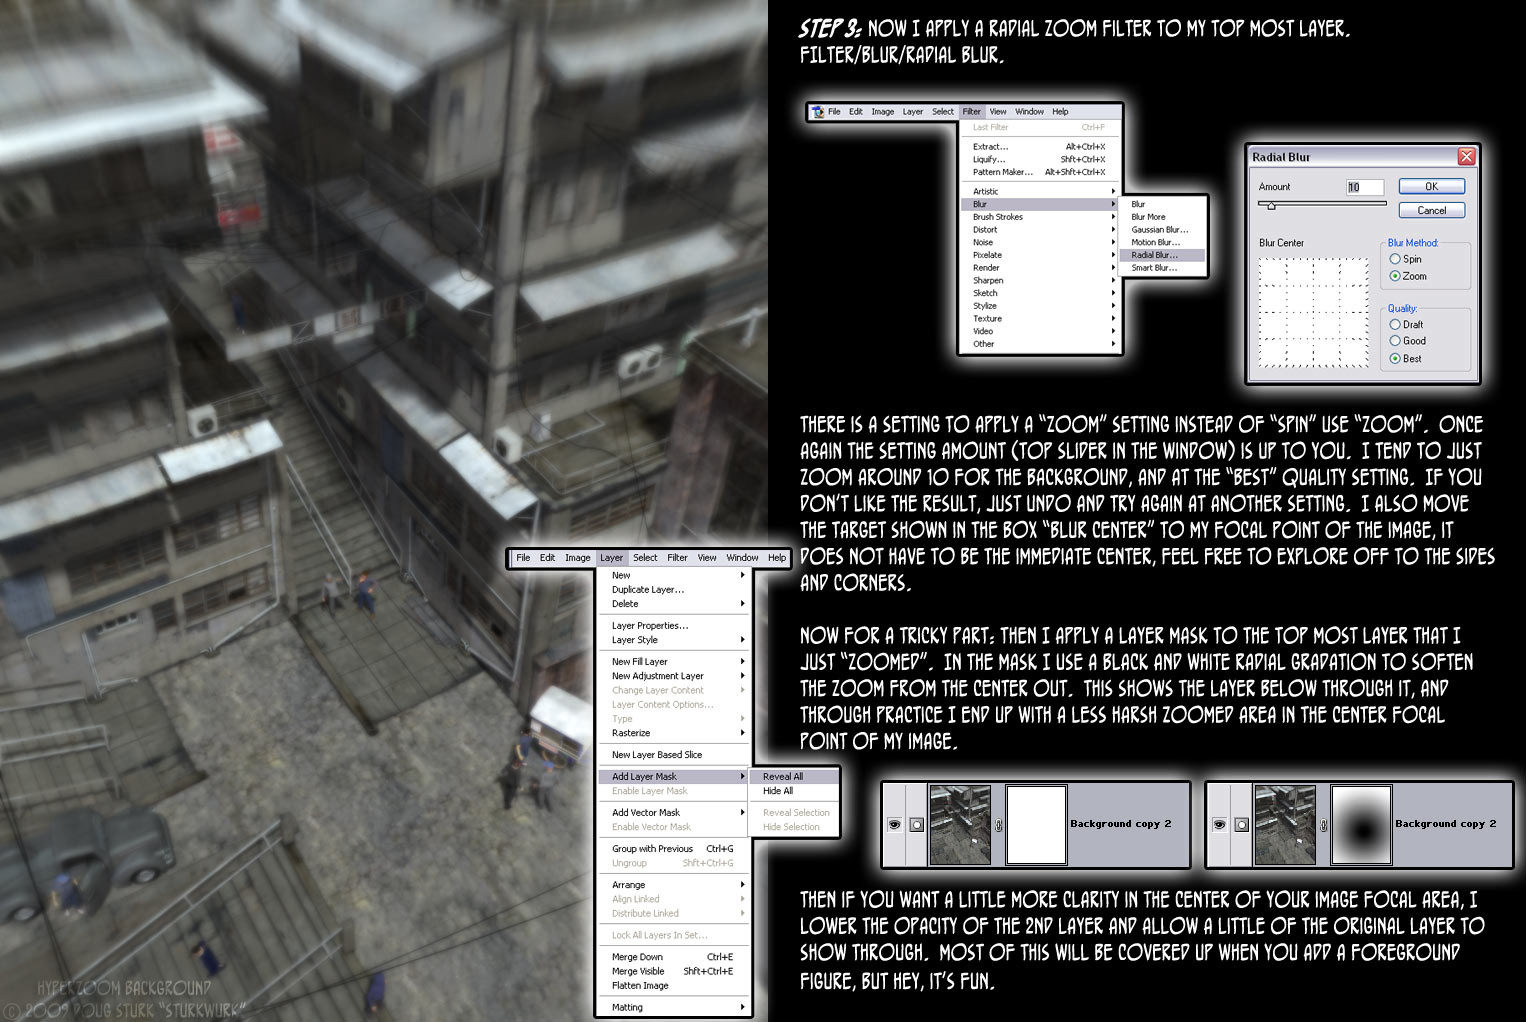
Step 3: now I apply a radial zoom filter to my top most layer. FILTER/BLUR/radial blur. there is a setting to apply a “Zoom” setting instead of “spin” use “Zoom”. Once again the setting amount is up to you. I tend to just zoom around 10 for the background, and at the highest quality setting. If you don’t like the result, just undo and try again at another setting. I also move the target shown in the box to my central focus point of the image, it does not have to be the immediate center, feel free to explore off to the sides and corners.
now for a tricky part: Then I apply a layer mask to the top most layer that I just “Zoomed”. In the mask I use a black and white radial gradation to soften the zoom from the center out. this shows the layer below through it, and through practice I end up with a less harsh zoomed area in the center focal point of my image.
then if you want a little more clarity in the center of your image focal area, I lower the opacity of the 2nd layer and allow a little of the original layer to show through. Most of this will be covered up when you add a foreground figure, but hey, it’s fun.
on to step 4... [link]
back to step 1... [link]


