HOME | DD
 Whimsical-Dreams —
Quick Tutorial: vintage style
Whimsical-Dreams —
Quick Tutorial: vintage style

Published: 2008-05-08 08:44:37 +0000 UTC; Views: 96082; Favourites: 2165; Downloads: 4572
Redirect to original
Description
 SUPPORT MY PHOTOGRAPHY AND LIKE MY FACEBOOK FANPAGE PLEASE!
 ") QUICK PHOTOSHOP TUTORIAL: VINTAGE STYLE
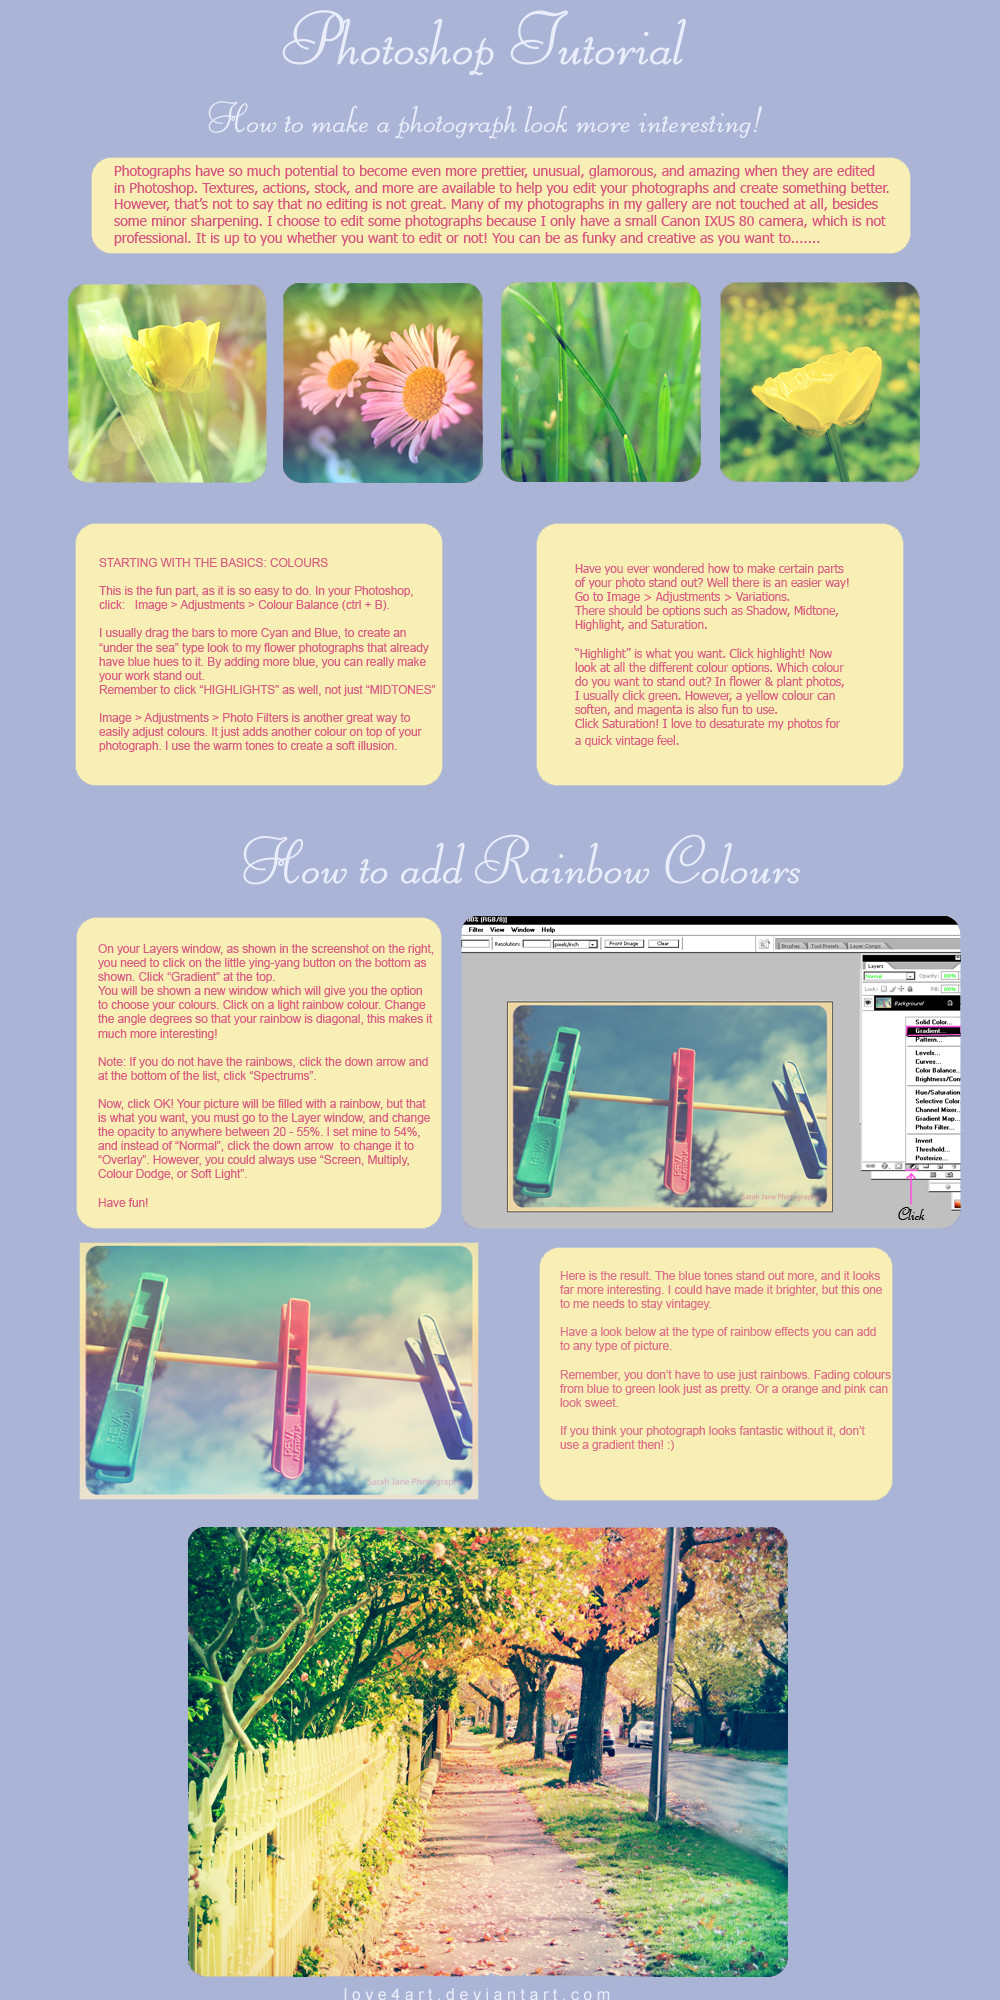
QUICK PHOTOSHOP TUTORIAL: VINTAGE STYLE So many people have asked me for some tips on creating a classy vintage-styled photograph. I've put together a small tutorial on the main tips, but there are MANY more. I'll touch on these now, as I couldn't fit them in the tutorial above.
 Create a classic lighting to your vintage photo. Click on Filter > Render > Lighting Effects. Choose Omni or Spotlight, and change the directions to create what you want. Image > Adjustments > Photo Filter can be a great tool to use when you really want to speed up the process. It can make your picture have a soft warm light, or a cold harsh blue light to it. Filter > Texture > Grain is interesting to play with, but not always necessary. It'll make a photo look like it's from the 1800s though (if it's black and white). A bad quality look can still look amazing. Brightness/Contrast, and Curves can help your vintage colours stand out, so don't forget to play with them too. Duplicate your image, and click in the layers window and choose different types of Light. I always use Soft Light, and you can do the same with a "New Layer" and a pretty colour on top of your picture. Don't forget about the opacity though, mine's set to 20% usually.
If anyone is stuck with photoshop and needs help, I'm always answering every note I get, so feel free to note or comment.
 Amazing Tutorials/Brushes/Textures You Must Look At:
+Package Vintage Grunge by Resurgere
+Free Photoshop Brushes
+Vintage effect tutorial
+Vintage Brushes by Purple-Quartz-Brush
+Vintage Photo Effect

EDIT: ...WOW! My first ever DD! This is such a huge surprise and honour, as this tutorial was my first one to make and all my effort in it has been rewarded for it- so thank you SO much, `joannastar for suggesting, and `Hanratty-Stock for featuring:.

 I hope everyone else benefits from the tutorial. If you have questions or want to show me what you've created, please do note me!
Related content


Comments: 209

thanks now all i have to do is trial it and see!! looks great btw!:joy:
👍: 0 ⏩: 1


Thank you!<333

👍: 0 ⏩: 0


👍: 0 ⏩: 1
Hmm, that's pretty weird, they worked before. But I took them out and I'll fix it later - thanks for telling me
👍: 0 ⏩: 0

Thanks hon. I hope you do try it out, I'd love to see what you submit using this style.

👍: 0 ⏩: 0

👍: 0 ⏩: 0


<= Prev |