HOME | DD
 AsjJohnson — Lelouch Color
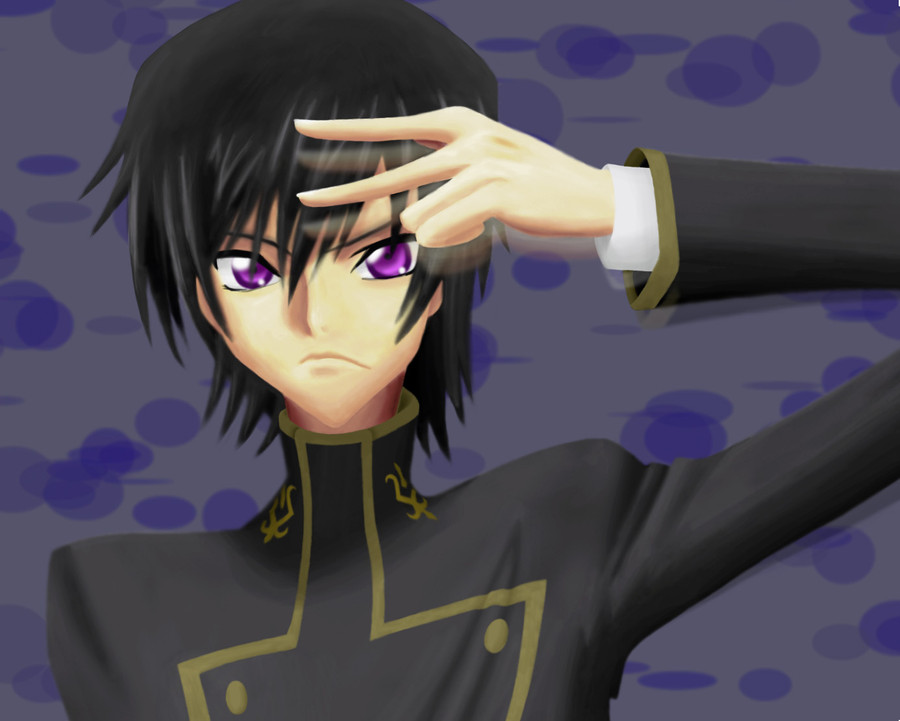
Published: 2008-09-29 15:13:47 +0000 UTC; Views: 926; Favourites: 28; Downloads: 20
Redirect to original
Description
(gasp!) Where'd his outlines go?! O_oI was experimenting with color. ^_^" I actually ended up using three different versions of the original picture (the shaded version is in my gallery) to paint over.
(download for 100% size. It's 1386x1111 pixels. but it'd be easier to see my messiness if downloaded. ^_^" )
I want to see yesterday's episode but I haven't been able to get online from my apartment. T_T (perhaps I can find a place where I can download the ep and put it on one of my jumpdrives...)
Information about how the picture was colored (as though anyone cares):
So, first I wanted to experiment with the foreground/background setting in PhotoShop (with my tablet, I can select the darkest shade as the foreground color, the lightest tint as my background color, and the harder I press on the tablet, the darker the paint is.) To get it to work right, I had to make the flow 50% and select the pen button next to that (which I should know what it is but just never remember).
(I had to use the background eraser on my pencil versions, by the way, so I could put the outlines above the color to see what I'm doing. Although it was also helpful to put the outlines below the color, so I could see what the color looks like after removing the outlines)
Next, I realized that the more different the foreground and background colors are, the harder it is to controll the shades it produces (slight change in pressure = drastic change in color), so I started messing with the opacity. If I wanted a slightly darker place around the shadows to smooth them down some, I'd make the opacity around 20%. I'd also use the eraser with opacity settings.
Then, since the smudge tool quit working, I found that the blur tool is actually pretty good.
(pic up to this point: [link] )
Next, I found that the contrast/brightness sitting made the picture more lively or interesting or something, so I went through and messed with that a bunch.
Lastly, I made the background by messing with the scattering sitting under the brushes tab, as well as a few other sittings... um... one sitting made the bubbles jitter between being round and flat, I messed with the foreground/background jitter some, and made the brush diameter sitting somewhat random (if I remember right). (I also had to change the diameter sitting when doing the foreground/background trick while painting, by the way.)
Related content


Comments: 5

Very nice job removing the lines without it looking weird! The only thing I'd critique is his mouth--it curves down a liiiiittle too far to be natural. But other than that it looks absolutely fabulous
 (Smile)")
👍: 0 ⏩: 1

Thanks. ^_^
I did mean for the mouth to be somewhat like that, because I think his frown looks so weird from that show, but it's kind'a cool. I may have went a little farther than the screenshot, though.
👍: 0 ⏩: 0

")