HOME | DD
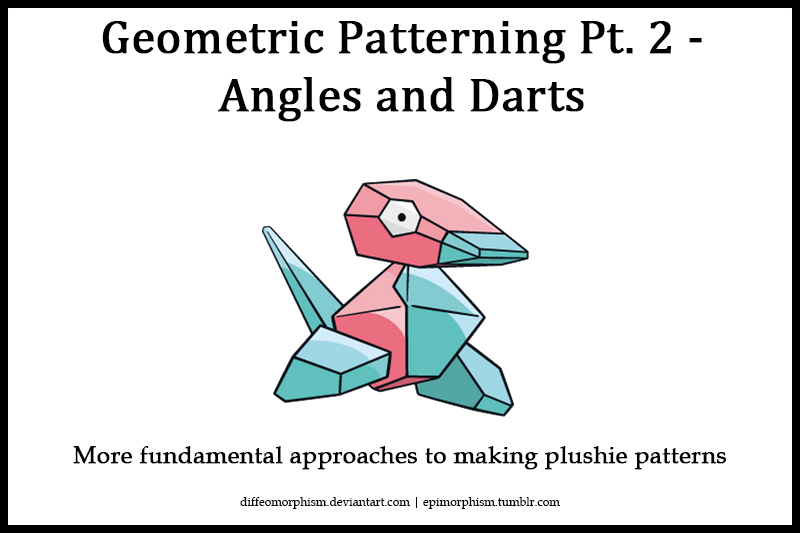
 Diffeomorphism — Geometric Patterning Pt. 2 - Angles and Darts
#beginner #beginnertutorial #guide #plushie #tutorial
Published: 2015-06-06 00:02:32 +0000 UTC; Views: 26010; Favourites: 296; Downloads: 1631
Redirect to original
Description
Haven't read Part 1? Read it here before reading this guide!Are you a total newbie who just wants to get into plush-making? Read my beginner's guide instead!
Finally, 1.5 years after I released my last Geometric Patterning guide, it's the guide that no one was waiting for and that no one will probably read!
This is a plushie-patterning guide which covers an advanced fundamental patterning rule called the Right Angle Rule; it covers important rules about angles in your patterns and how they lead to seams which are nice and smooth or, when violated, cause puckering and other undesired features. It is a bit more abstract than my last guide and significantly more abstract than most patterning advice you will receive, but I feel like if you manage to internalize the guidelines laid out in this guide, you'll be well on your way to creating nicer-looking plushies.
To avoid being too abstract I've of course included many applied examples of ways in which you can use the rules in the guide. This is a pretty dense writeup, so if there's anything which needs clarification please let me know and I'll explain it as best as I can. Feel free to ask me questions in general too! If enough people ask about something, I can update the guide no problem.
Related content


Comments: 33

👍: 0 ⏩: 0

Hello! I wanted to know if making an oval shaped plush would I just need two darts? One on top and another on the bottom? It's kind of what I noticed in certain plushies but I always have trouble drawing out the pattern;;;
👍: 0 ⏩: 0


I have a question about pattern designing. I working on baby TMNT plushies. I made a four piece circle segments. I figured out how to make a pattern for Donnie, who has a slight pear shape. I was trying to create a pattern for Mikey buy shorting the segments and widening the sections.
I got a shape that was more square than round, which is closer to the shape of Leo and Raph. How can I make the Donnie head pattern wider at the forehead and cheeks without getting a squareish shape pattern?
👍: 0 ⏩: 1

I actually did something like this on my most recent plush ; his face isn't as pear-shaped as the turtles but it's similar. I wrote a little thing on Tumblr explaining how I worked with this sort of face, check it out here! Basically you start with the shape you want for the front face, add some darts, and then round out the back of the head. But yeah, in the future I probably won't be using 4-piece spheres much, they do tend to turn out too boxy for anything larger than a few inches.
👍: 0 ⏩: 1
I saw that post. I not sure if that method will work since the side view is necessary to the overall design of the plush. I might try adding two more sphere segments to the pattern to increase the roundness. I saw a doll that used that technique that had two nose segments and four sphere segments.
I have also thought about adding a base to the segments, but I don't know how to figure out the correct width of the base.
I didn't know the four pieces sphere was naturally boxy; I thought designed the angles wrong.
👍: 0 ⏩: 1
Ah OK, that makes sense. If you're using a fabric which doesn't stretch much then indeed, the 4-piece sphere tends to be insufficient. In general, there is there is always a tradeoff between making your plushie more round and having to use more pieces meaning more visible seams; if you're OK with using 6 total then I think you could modify the 6-piece sphere pattern for your needs fine. You might also be able to use a combination of the two techniques, since in the end the back of the head doesn't matter so much as long as the front view is fine and you can see the definition of the front of the face from the side. Admittedly I don't have a particularly good solution in my head at the moment
")
👍: 0 ⏩: 1
I think I might try the combination of the two methods. A women named Darlene Raush makes doll pattern that is made up of doll face, head side,and head back. The patterns have no seams on the front of the face, but the doll has a nice profile.
what is best way to design different segments for plush or doll pattern? I haven't seen any pattern making how to's on making a four piece head that wasn't a ball. I have no idea how to make three or four piece head.
👍: 0 ⏩: 1
Honestly the best way to learn plushie design is to mess around see what works and what doesn't. I'm sure you've seen my tutorials already; the concepts in those tutorials, plus the experience of just having tried a bunch of stuff and knowing what sorta works and what doesn't, is how I approach most of my patterning. I apologize for this being a vague response, haha, but it really is how I approach figuring out a shape I've never had to work with before.
👍: 0 ⏩: 0

I just read all your tutorials! Thank you for sharing your knowledge and trials. It is people like you that advance happiness in the world. I will one day fix my patterns and make cute stuff for my baby and when I do I am going to mention you : )
👍: 0 ⏩: 0

First things first: Thanks for the amazing tutorial!
Not only it helped me make quite a nice first pattern, it made me revisit a bit of my calculus knowledge (Well, what's left of it... Never used it since I left engineering college).
By the way, If you could give me a little bit of advice, I'd be very thankful... You see, I'm -this- close to finishing a torchic plushie, exactly that first pattern I just said... The thing is, the beak didn't turn out so good. The first try was using the side view-gusset method, along with a triangular base, but it ended up too big, with an odd angle, and not as roundish on the top as I needed. This time, I've decided to take a different approach, and use a dart on the top and sides of the beak to curve them outward; however, there's a small strip between those areas that's curved towards the inside, instead of the outside. How could I do that kind of curve? Thanks in advance!
👍: 0 ⏩: 2
Are you going for an open beak or closed? If closed, I think I would sew it on using a 3-piece approach, nothing fancy. You can think of Torchic's beak kind of like a tetrahedron with slightly curved edges. If you look at my Aromatisse plushie, I'd go for a similar approach; it's hard to see but there's a seam down the middle of the top of the beak, and then there's a triangular piece as the bottom part of the beak.
Sorry for being a little vague, I must admit I'm not 100% sure how to diagnose your problem. If you show me a picture of the issues you're having I could probably help diagnose it a bit better!
👍: 0 ⏩: 2
As it ends up, a bit of tweaking with my previous pattern was enough to get to the shape I needed... And it was quite easier than planned, actually... oi58.tinypic.com/29d9xrl.jpg
Sorry for bothering you, and thanks for the help!
👍: 0 ⏩: 1
Haha no problem, I'm happy to help. Sometimes you just gotta finagle around with the patterns until you get it just right. It looks great
👍: 0 ⏩: 0
I'm going for a closed beak, but the 3-piece approach didn't work all too well when I tested it, it ended up somewhat odd. Maybe I'll try ro revisit the technique. Currently, I'm working with the Battle Revolution 3d model as reference, so, after messing with it a bit, I've ended up with a bit of a diagram: tinypic.com/view.php?pic=30ix3…
The red, blue, and yellow areas I've already figured out, they'll pretty much be a heart-like figure, three triangles joined and notched, and a smaller rounded triangle for the lower beak. Up to that part, no big deal. The only problem is the greenish area, that should have something of a crease along it. I was wondering if it would be possible to make a "soft" crease with the pattern itself, instead of the "hard" crease I'd obtain by thread-modelling it. Also, It would avoid unsightly needle holes in the fabric, since that appears quite a bit in felt... (I wish some store sold fleece or some plushy fabric around here...)
👍: 0 ⏩: 0
Actually, leave that be. Just figured a little string inside the beak, pulling one of these creases towards the other one, should do the trick. Still, thanks for the amazing tutorial and for all the other tuts and patterns too!
👍: 0 ⏩: 0

Thank you sooooooooo much for your tutorials! It really helped me and gave me confidence! I am beginning plush crafting, and much more at ease with mathematical approach than with most tips found on the net, based on casting and trying, what you shared is very valuable!
By the way, I have trouble with patterning something, could you help me, please? I know that there is existing patterns on the net, but I have no printer and knowing how it works could be useful for other patterns
I wish to do a top hat wider at the top than at the base, I need the "band" pattern to be curved to respect the "Right Angle Rule", it is a bit the same situation that in Pharamp's neck, the problem is the curves and the height have to have precise lengths, and I don't know how to draw this (I do everything on paper).
The shape I wish to do is a bit like in the e. figure there lynnmcmasters.com/flare/wellin… with top curve 19 cm, bottom curve 15 cm, and height 9 cm. I managed to have the good lenght by inserting a dart of 4 cm top, but it is 3 segments instead of a curve, and I am afraid it won't look smooth. Is there a way to achieve that, please  (Smile)")
👍: 0 ⏩: 1
I'm not sure if this is what you're going for, but personally I'd do something like this: i.imgur.com/bI73gsJ.png
Sorry, I kinda hastily sketched that out in a minute, you'll need to redraw it with the correct proportions. Let me know if I misunderstood
👍: 0 ⏩: 1
Thank you for your quick answer!
I would have liked to be able to mathematically determine the curve thus the bottom lenght, I looked for some formulas in the "circular segment" Wikipedia, but since I only know the arc length, couldn't do much ^^
Really sorry that the work you made seems not to be ok :$
👍: 0 ⏩: 1
As far as the pattern I gave you, keep in mind that the top of the hat can still turn out flat even though the top of the pattern pieces is curved. You just attach the 4 pieces to a circle for the top; the circle should sit flatly on the top. That's one of those things which seems wrong intuitively but actually works out when put together. Now if you're talking about the brim of the hat being curved, I'll have to say I'm not sure how to do that. Admittedly I'm not 100% sure which hat you're trying to replicate, or if you're having trouble with something different entirely. But yeah, don't worry about exact lengths for now; it's more important to get a shape which works first and then you can adjust the lengths as needed.
👍: 0 ⏩: 0

#Diffeomorphism Can i request a tutorial even if you don't take them? Can you post a 3D Buneary plush toy tutorial? Thanks for the great tutorials you have posted from various plush toys tutorials such as Geometric Patterning Pt. 2 - Angles and Darts.
👍: 0 ⏩: 1
Unfortunately I can't release patterns for plushies that I haven't made, and unfortunately Buneary isn't really anywhere on my personal project list. Thanks for the interest though
👍: 0 ⏩: 0

i always enjoy reading your tutorials they are always so thorough and well written.
👍: 0 ⏩: 1
Thanks a bunch, I'm glad you found it interesting and not too confusing! Hopefully it'll help you out in your endeavors
👍: 0 ⏩: 0

I have always understood the purpose of the darts but I can never eyeball how big my darts should be. Should they be wider? thinner? I dont have the fabric to spare to test all the angles T_T
👍: 0 ⏩: 2
The important ideas are that the length of the dart controls how much of your pattern piece gets curved by the dart, and the width of the dart controls how intensely the piece gets curved. Admittedly I mostly eyeball my darts on how long and wide the darts need to be.
👍: 0 ⏩: 0

A seam ripper is your best friend in situations like this! It's extra work, sure, and sometimes your fabric will have holes left behind, but it's great for practicing.
I should take my own advice and practice more. AHAAA. /sobs
👍: 0 ⏩: 1
this is a good point. I keep forgetting i own one of those silly things....
👍: 0 ⏩: 0

It's glad to see your second tutorial of pattern making, I can feel the efforts you put in the part explaining right angle without too much math.
Generally speaking I agree with your observation about right angle, but I'm curious if the length of darts has much influence than angle on the resulting shape.
If you split the shape with many seams, the fragments will become very small and can be all flattened.
Therefore I think longer darts may help flattening the shape and reduce puckers...though obviously you wouldn't want a plush with too much seams.
I think darts with length of radius of curvature is enough in the ideal case.
However, for complex shape, this may not be the true since the boundary (seams) does not reflect the shape nearby.
I also find a special case of darts like this knowledge.autodesk.com/support… (see the part of Darts)
Darts are not necessarily to be connected with other seams. It can be insert into any part of a shape.
This is usually the case of Hyperboloid-like shapes where the radius of middle part is smaller than the one of top/bottom.
If you're interested, you may want to read a book called "Pattern Magic" which is written by a professional garment designer.
It does not explain the theory behind pattern making, but it give a series elegant walkthroughs which is highly inspiring.
Though I would like to share some thoughts with you, I still haven't found the insight of pattern making like you.
What I can do now is write a program to test if the (heuristic) criterion of seams defined myself works as I expect. (Unfortunately no, currently, LOL)
👍: 0 ⏩: 1
Yeah, "darts" really just refer to any sort of internal cut on a pattern piece intended to reshape it. The most common ones I run into are the darts similar to a sphere, but I did remember that there were other types of darts like the diamond cut shown in that link used for making things like pony manes and stuff (obviously haven't had experience with any pony stuff).
The length of a dart definitely plays into it; since you can essentially think of the darts I'm talking about as little "segments" of spheres, you should be able to determine the length of the dart you desire by the desired radius of curvature for the section. I think that's something which you might be able to consider in your attempts to programatically deconstruct models, since in 2-D curvature is defined as the inverse of the radius of the circle which is "tangent" to a curve at the point; I'm sure there's a 3D (and n-dimensional) analogue as well which could give you some insight. But the point is that it's not a matter of whether the angle or the length of the dart is "more" important, because my contention is essentially that having proper angles is a necessary, but not a sufficient, component to creating good darts.
I definitely applaud that you're still trying to find a criterion for where seams should go, especially since plushies embody so many different body types. I still would have no idea where to go, haha.
👍: 0 ⏩: 0

nice and well explained! thanks for making this alex!
👍: 0 ⏩: 0

I'm not very good at math, but still think this is a great tutorial! Thank you very much.
")
👍: 0 ⏩: 0