HOME | DD
 DyMaraway —
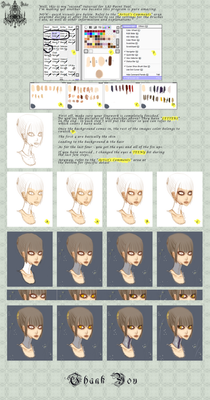
Coloring Tutorial and Sai Tips

Published: 2011-02-14 05:51:01 +0000 UTC; Views: 418415; Favourites: 18408; Downloads: 10149
Redirect to original
Description
I really hope this will be useful for some people. I know I'm not saying anything "new" but I've did my best to include some stuff that usually i don't read at some SAI or coloring tutorials.Thanks if you read it all. I know sometimes it might be boring, having so much text for a simple coloring step, but as english isn't my main language, I felt I had to be more specific with descriptions -anyways, sorry if my english isn't good enough or sounds like when a song is played over and ooooover again-
>3< Fullview of course, or you won't read anything hehehe.
---------------------------------------
OMAGAH I GOT A DD!!! THANKS TO EVERYONEEEE! *3* THIS IS MY FIRST DD AND I'M SOOOO HAPPY!
---------------------------------------
***COLORING TUTORIAL AND SAI TIPS:
PART 1 [link]
PART 2 [link]
PART 3 [link]
---------
***Translations:
PART 1 (RUSSIAN): [link]
PART 1 (GERMAN): [link]
---------
Please read every tutoria and every answer for the FAQ section at this description very well before asking something.
Feel free to ask anything related to SAI and this tutorial.
---------
***DOWNLOADS:
Elemap Tones, Papertex, Brushform, Brushtex Files: [link] (Just extract them and copy-paste them inside your SAI main folder overwriting the existing files)
---------
F.A.Q:
(updated 15/01/2012)
"WHERE CAN I GET SAI?"
[link] this is the official site, where you can get a free trial for one month, after that you must buy it..... yes, piracy DOES exist but i won't tell you where.
"CAN I DO THIS WITHOUT A TABLET?"
It's not easy, but yes, you can. The result might not be exactly the same but you can get a similar work. But you have to arrange the transparency and other features of each brush to achieve certain effects. How? Well, i don't know, i don't paint with my mouse for more than 3 years so i forgot how to do it.
"CAN I USE THIS WITH OTHER PROGRAMS?"
Yes, you can. Not everything, but at least the coloring technique.
"IS THERE SAI VERSION FOR MAC?"
No, but there are other good programs for MAC, you can try those.
"WHAT'S THE SUPR BUTTON?"
Sorry people, i don't own a laptop with the keyboard in english, so i think you have it as "delete"
"CAN YOU SHARE YOUR WATERCOLOR BRUSH SETTINGS?"
[link]
"CAN YOU SHARE YOUR REDJUICE BRUSH SETTINGS?"
[link]
"CAN YOU SHARE YOUR CHARCOAL BRUSH SETTINGS?"
[link]
The texture and the brush tip can be found at the download section of this description.
"WHITE LAYER AND DARK LAYER... I JUST DON'T GET IT"
[link] check this small pic to understand how to arrange them. Why do i use them? As you see, i paint and my color doesn't respect the lineart at first, so i erase later... to find every part that i wanna erase, instead looking at a white background i use the dark layer. Also, if the white layer is well done enough, i can select it, invert it and erase the parts that i don't need without using the eraser -which takes more time-
=A= well... as it's kinda hard to explain and stuff... I've made another pic to explain it as a step by step... Some of you might notice the good side of using both... if you don't it's fine... that step is optional anyway. [link]
Anyway a lot of people asks me this even if the answer is big, with examples and clear, so i won't reply to that question again.
"HOW CAN I MAKE MY OWN BRUSH"
Read the part 2 please *link at the begining*
Related content
Comments: 1616

This is so very helpful especially when I am used to Adobe ( now dead 
I've added this to my "SAI Tutorial" Favorite folder
👍: 0 ⏩: 1

owo i'm glad!
thanks for your comment! : > i'll be adding more tutorials soon
👍: 0 ⏩: 0

i now regret not installing SAI on the computer
👍: 0 ⏩: 1

This is the most helpful tutorial I read! Thanks for making this wonderful tutorial 
👍: 0 ⏩: 1

thanks for the comment! : D
👍: 0 ⏩: 0

Great tutorial 
👍: 0 ⏩: 1

made it by myself -tutorial 2 plz-
👍: 0 ⏩: 1

Thanks. What settings did you use?
👍: 0 ⏩: 1

you can find the settings at the tutorial description
👍: 0 ⏩: 0

Wow, thank you! This is so very useful! The way you colour reminds me of the 'visual novel' style of colouring, and I always wondered how to achieve that, so this will definitely come in handy! 
👍: 0 ⏩: 0

This was so helpful!! But I do have a question: How do you get the "additive" and " detection" modes? I know where to change the mode, but I don't have those options. Are you using a really new version of Sai? If so, which one? Thank you for sharing this wonderful tutorial with everyone!
👍: 0 ⏩: 1

as the program has a "crack" to let me view the text in english, i think it's a translator issue. A lot of people asked me this already, so all i can suggest is to try with each mode to get a similar effect VwV
👍: 0 ⏩: 1

Oh okay then, thank you! X3
👍: 0 ⏩: 0

This tutorial is so helpful!!
but i wish my lineart and coloring could be better D:
Anywayz awesome tutorial keep it up!
👍: 0 ⏩: 1

Seems a bit complicated, but I really like to use this tutorial.
👍: 0 ⏩: 0

my thank you can i share this on facebook to my friend??
👍: 0 ⏩: 1

Hi! Great tutorial! Thanks! I just have one question. I recently got Sai and made my first lineart. I sarted coloring it, but midway I got curious and started experimenting with other things. When I got back to the picture, I realized that when I tried to color it, the color I was using kimd of fused with the base color. I mean, first I colored everything green and I was coloring the hair red. When I wnet back to coloring it, the red and green made the pen color be brown. How do I fix that?
Sorry if I didnt explain myself!
Any way great tutorial!
👍: 0 ⏩: 1

sorry but I can't understand what you do and what you want to do.... so I'll try to answer with the few facts that I do understand...
you were coloring at the lineart layer or a different one? if it was the same layer then it's kinda your fault and you shouldn't do it unless you are used to it and stuff.... if they were different layers at first, maybe you merged them with ctrl+e or the merge layer button... anyway this option leads you to the same place where you are if you paint at the same layer....
and... i don't understand the green-red-brown part.... sorry
thanks!
👍: 0 ⏩: 1

Thanks for responding! I'm sorry if I didnt make myself clear, I cant really explain things...jeje
Anyway this wasnt really what I was asking (meh, it's my fault for not knowing how to explain properly) but thanks anyway!
👍: 0 ⏩: 0

I love your tutorials. I'm a real beginner at SAI because I was unhappy with how blurry photoshops lineart turned out to be and with it's painting process. Thank you very much!
👍: 0 ⏩: 0

very nice tutorial 
But how can i create a dark layer?
👍: 0 ⏩: 0

Great tutorial,the problem is it's really hard for me to line using a 0.5 pen,i usually use a bigger brush size
👍: 0 ⏩: 1

XD well, all my steps are optional so draw in the way that makes you feel more comfortable XD
👍: 0 ⏩: 1

But using a bigger pen makes the black lines visible,so i guess i'm gonna use a smaller one
thanks for the reply anyway
👍: 0 ⏩: 0

Me encanta tus tutoriales mas explicado imposible. Tengo una pregunta me podes decir paso por paso como haces el dark layer, o mostrame alguna foto de como lo haces, porque me encantaria ponerlo en practica. Espero ansiosa tu repuesta
👍: 0 ⏩: 1

tengo que hacer una actualización de ese paso.
En su lugar, haz lo siguiente:
1)Pinta en una capa toda la silueta -obvio con relleno- del objeto o personaje que quieras hacer. Yo usualmente lo hago en blanco, pero puedes elegir cualquier color.
2) Crea un nuevo layer y busca la opción "clipping group" que se encuentra en la parte arriba de donde están tus layers, activala. El nuevo layer tendrá una pequeña sangría en comparación al layer donde hiciste la silueta. Esto quiere decir que has activado la opción de clipping group.
3) pinta en el nuevo layer -si, tu nuevo layer estaba vacío- notarás que todo lo que pintes, respeta la forma del layer del paso uno. Esta era la función original de mi dark y white layer, pero encontré esta herramienta y me parece más útil.
Cada layer nuevo que hagas, estará normal, pero puedes agregarlo al clipping group.No importa cuantos agregues, siempre respetarán la silueta del paso 1
Si creas otro layer como en el paso 1, puedes hacer clipping group para este tmb. Es decir, puedes hacer varias siluetas y pintar sólo sobre cada una de ellas de acuerdo a como ordenas tu layer.
Espero que quede claro, sino espera el update de la tutorial para entenderle mejor
👍: 0 ⏩: 1

Ay muchas gracias por tu respuesta, y si lo comprendí muy bien. Pero igualmente voy a esperar el update del tutorial. Gracias por compartir tus técnicas de trabajo. Lo aprecio mucho, ya que me tmb me gusta dibujar mucho. Saludos
👍: 0 ⏩: 0

Oh, this tutorial is WONDERFUL. Thank you very much!
👍: 0 ⏩: 0

Yayz, this is so helpful. You're really good drawing, I'm a bit jealous. XD I'm not terrible at drawing but I could be much better (although I think I'm really good when I think of how I've gotten this far from natural talent and how-to books/online tutorials only). Coloring is one of the things I really want to improve on and I find this tutorial to be really helpful! Thank you!
👍: 0 ⏩: 0

I'm not sure what files to override to get the same brushes as you.
👍: 0 ⏩: 1

I don't know how to explain an answer for that comment without writing again everything at the second tutorial. Have you checked it already?
👍: 0 ⏩: 0

Eeeeeeeeeeeeeee!!! I've been looking all over the place for a tut like this! Thank you thank you for posting this! I love it! x3333333
👍: 0 ⏩: 0

Thank you so much! I'm finally learning!
👍: 0 ⏩: 0

OMG I am finished ^^ I hope you like it > [link] I linked your name and your tutorial to it ^^
👍: 0 ⏩: 1

waaah so fast!
As I'll make a remake soon -i don't know when but soon- I'll be able to give you a photoshop file with the same text and the new parts if you wish to update too.
Thank you so much for your help! : >
👍: 0 ⏩: 1

Question: I cant save my picture since the save and save as buttons arent avalible. How do I save then?
👍: 0 ⏩: 1

i don't know...
1) reinstall sai
2)make a new file and check if you can save it
3) can you close the window if you draw inside a new file? sometimes when you are about to close without saving, the program shows a small window
4) If you can save with another file, copy and paste each layer from file 1 to file 2 and save with another name
those are the only things i can think about
👍: 0 ⏩: 1

oh. ^ ^ I think I get it now. It DID say that the download expired so yeah. TYSM
👍: 0 ⏩: 0
<= Prev | | Next =>


