HOME | DD
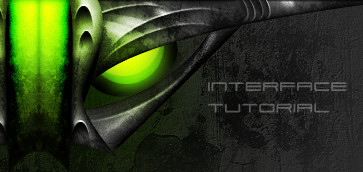
 knobibrot — Interface Video Tutorial

Published: 2007-10-30 16:11:15 +0000 UTC; Views: 9479; Favourites: 68; Downloads: 1717
Redirect to original
Description
This is an Interface Video Tutorial I made.My Photoshop is in German, so I hope you can handle it.
In this RAR-Archive are 2 Files. The smaller file shows how to create the shapes and the lager file shows how to make them stylish.
Hope you like it, and leave me some comments.
Check out [link] for more Tutorials.
Related content
Comments: 25

I use Gimp but followed the tutorial. Mine turned out pretty good. My results could use improvement.
👍: 0 ⏩: 0

Very nice indeed. I'll post my outcome soon.
Thx a billion times for such a nice tutorial.
I learned a lot from this.
cheers
👍: 0 ⏩: 0

Thank you very much for this tut, i learned a lot of new things with it
👍: 0 ⏩: 0

Here is my result: [link]
Can I make this into a PB Premade? I'll give credit and link back. If you want I'll also include a copyright in the skin.
I learned a lot from this.
👍: 0 ⏩: 1

yeah sure, go ahead!
credit is just fine, you don't need a copyright.
I mean, it's your skin! I just showed you how to do it, so theres no need for a copyright.
nice result, by the way
👍: 0 ⏩: 1

Thanks! ^_^
If I make a skin I'll be sure to give credit and link back so other people can see this tut.
👍: 0 ⏩: 0

English!!! 
I'll post my result soon. I love this style!
👍: 0 ⏩: 0

(übersetzt aus Englisch 

👍: 0 ⏩: 1

hey, thx so much for your comment!
I really appreciate that you like my tutorial...
👍: 0 ⏩: 0

sehr cool *download*
werd ich mir bei Gelegenheit mal zu Gemüte führen...
👍: 0 ⏩: 1

thx
freut mich, dass es dir gefällt
👍: 0 ⏩: 0

nice tut, aber schade das es so ruckelt. trotzdem sehr gutes tut
👍: 0 ⏩: 1

ah, mit wmp ruckelts nicht. aber ich bekomme die brushes nicht so hin das die verlaufen. was muss ich denn da einstellen?
👍: 0 ⏩: 1

Kommt auf die Brushes an.. also die die ich verwendet habe verlaufen von selbst.. Wenn das bei dir nicht klappt, musst du die Brushes eben von hand verlaufen lassen.
Außerdem immer dran denken die Ebene der Brushes auf "Überlagern" (Photoshop CS2) bzw "Ineinanderkopieren" (Photoshop 7) zustellen.
👍: 0 ⏩: 1

ja das hab ich schon versucht einzustellen bei zeichenstift-druck, geht aber irgendwie nicht. bei mir bleiben die so. wie heissen denn die brushes die du da verwendet hast? würd das gerne mal testen mit solchen brushes. bekomme das nicht besser hin als wie hier : [link]
die highlights sind derbe schlecht geworden, aber bis jetzt mein bestes work
👍: 0 ⏩: 1

Das hat nichts mit dem Zeichenstift-Druck zu tun. Die Brushes selbst haben die eigenschaft zum rand hin zu verblassen.
Die Brushes die verwendet wurden heißen SFX_Grunge_1 und können hier geladen werden: [link]
(steht glaub ich auch in der Readme vom Tut)
Zu deinem Werk: Sieht doch echt nice aus. Fehlt vielleicht etwas Kontrast (und Farbe, aber du willst es sicher s/w lassen), aber denke mit Brushes wird das schon gehen.
👍: 0 ⏩: 1

cool danke. hab die readme nicht gelsesen
die kabel wollte ich noch farbig machen aber sonst in s/w lassen. werd die brushes gleich mal testen. mal gucken ob ich das noch besser hinbekomme.
👍: 0 ⏩: 0

sieht wirklich geil aus was du da zauberst,aber laggt das Video nur bei mir so?
👍: 0 ⏩: 0

Danke, das Tut ist echt genial. Hätte nie gedacht, das es doch so simpel sein kann so komplexe Formen und Effekte herzustellen
👍: 0 ⏩: 0


