HOME | DD
 lapis-lazuri — Snow Leopard - Step by step
Published: 2010-12-16 21:17:59 +0000 UTC; Views: 6627; Favourites: 253; Downloads: 134
Redirect to original
Description
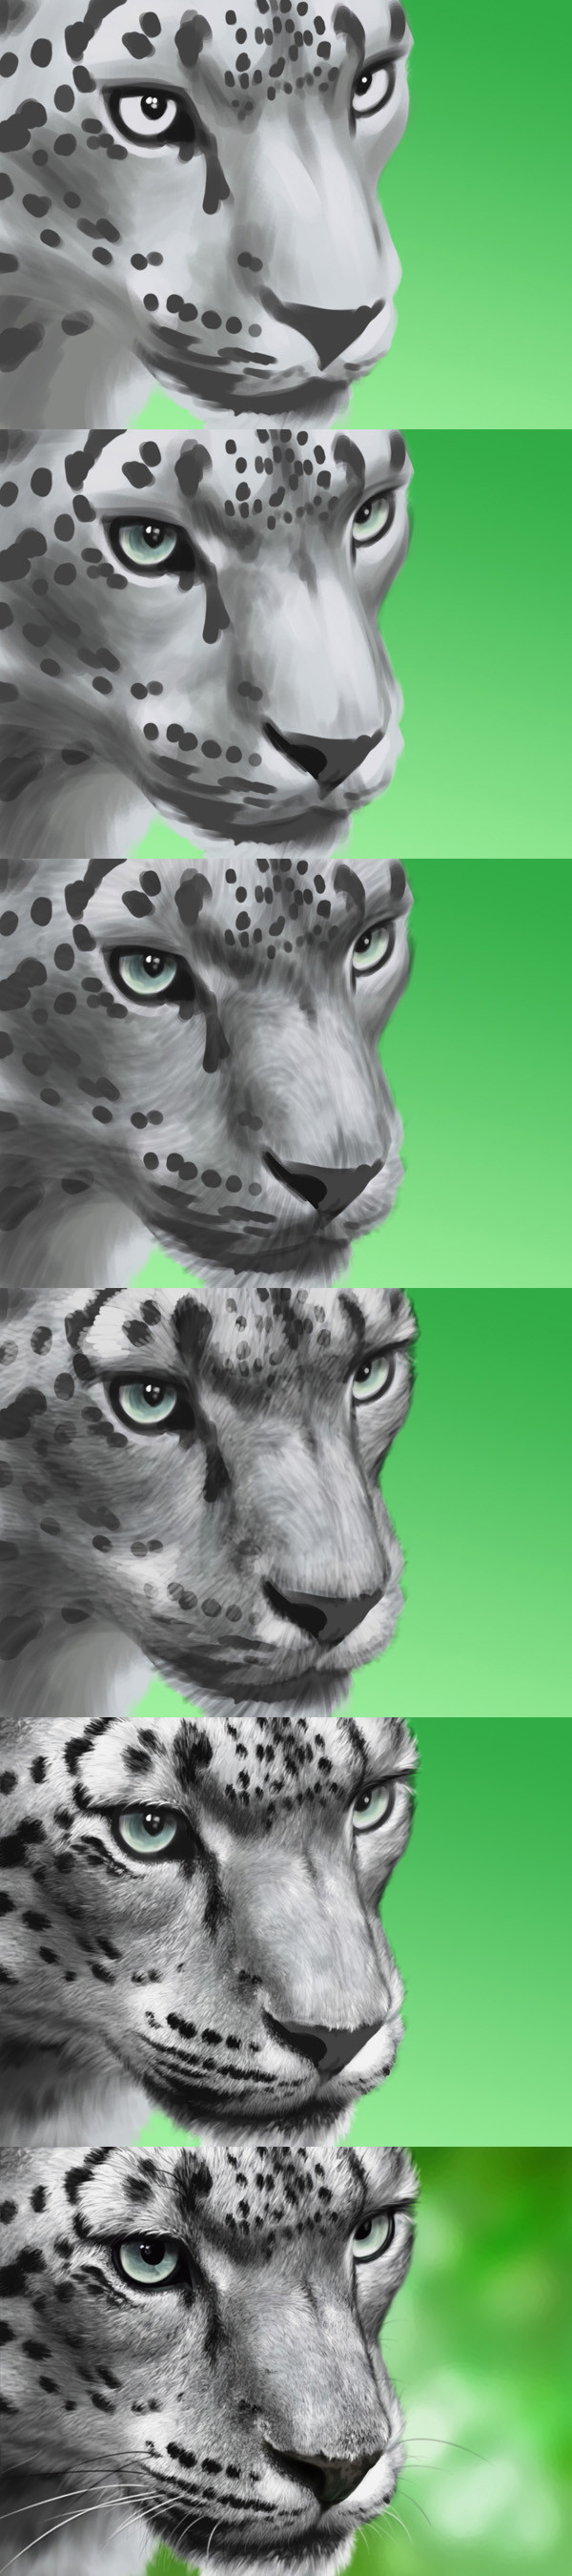
step by step. Done from a reference with Genius Tabled in Photoshop CS4.I. As usually I start with the concept. First thing is background: Gradient Tool, set to Normal, Opacity 100%, with two different shades of green. Then I painted the rough shape of the head. The face, the mandible, the throat and the eyes were all in separate layers. Added another for the first basic shadings and one for the spots. Note that these spots only mark where I'll paint darker fur later; I'll overpaint them completely so nothing of them will remain in the final picture.
II. I added some smoother shadows in another layer. (I like creating additional layers for each grade of shading or lighting I do. Note as well that I always use either a half-transparent layer, or a less opaque brush for shading.)
I also added some of the first details: the nostril and the eyes. I wanted to create myself an idea of what hues and colours I would need for the irises.
All until now may look as good as a half-done picture, but it took about 10-20 minutes to do. The next 4 hours were swallowed solely by the fur.
III. Next step is, of course, to add another layer. This will be the basis for the fur. With a dark-coloured brush (Opacity about 50% I think) I drew a few strokes for the fur to mark its direction throughout the leopard's face. Note that the brush here is relatively thick. With each new stage I'll use more and more thinner one to get detail.
IV. I started shaping out the fur. First I darkened a little some of the shades, especially the spots. Then picked up a thinner brush with light colour and, again, Opacity 50% and went on drawing the fur keeping the directions.
V. There is a gap of about two hours of drawing tiny lines between Stage IV and Stage V. You really need patience for something like that.
I started with the spots, using this time fully opaque brush and black colour. Note that the spots are not as round and evenly-shaped as they used to be. When drawing spotted fur, you must keep in mind that the spots are actually shaped by the hairs, not the skin. Then I added another layer and drew some really light spots on the face, like on the forehead and the muzzle. Then back to shading, darkening some of the shadowed parts a bit more for better contrast and relief. All these shadings and lightings keep using relatively thin brushes and followed the direction of hairs.
Then it comes to the most exhausting part. On another layer, using a real thin white brush, I started drawing tiny little nasty hairs. Now is the time when you have to not only follow the fur's direction, but also vary it a little bit (note that the hairs on most places are not perfectly parallel, each is straying from the main direction a little).... This is not very easy to do and it requires some random motion of the hand. Also, the pressure you apply should be also variable to get additional shading. Here and there I added single hairs with higher pressure - they turn out white and give the fur silvery look.
Another important trick is to draw some hairs as dots instead of short lines. These are the hairs that stand up directly towards the viewer.
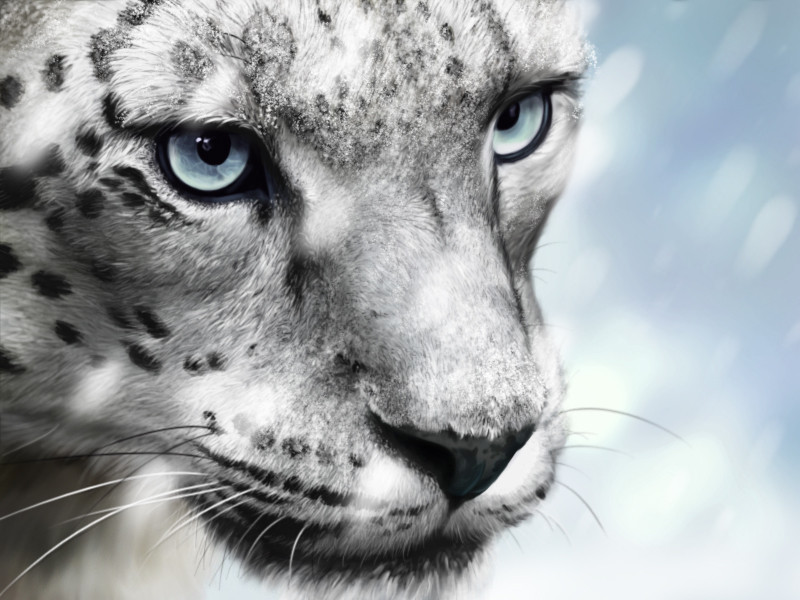
There is a trick with the mandible as well. Because it was on a separate layer, I could freely add some real black area right beneath the upper lips. This also makes the light hairs on the upper mandible stand out. The brush I used for the mandible's hairs though was thicker, see the reference picture if you need to know why. The same is for the throat - it's just out of focus, so I virtually didn't need to draw its fur at all. For the same reason I never used thin brushes on the farther side of the leopard's face, behind the nose.
VI. Finalization of the fur takes place here. I could have skipped this, but I just wanted to try out the idea I had. I should say I was more than satisfied with the result.
To do this, I added another layer and picked a very thin brush and black colour. Then zoomed in and started to draw very very tiny dark lines dispersed as randomly as possible amongst the white fur on the nose cheeks and muzzle. These represent gaps between the white hairs. I then used a little thicker brush for the same thing on the forehead (as you can see the fur is longer and thicker in there). And then I finalized the whole thing with some longer white and black hairs here and there, including the whiskers.... added details to the nose and eyes (note the spots and the elusive greenish reflection on the lower part of the nose).... smudged out the throat's fur to give it a really fluffy look.... And that's it.
Background done mainly with colour burn and dodge tools to get blurred spots of different shade and intensity. Then used the Palette Knife filter to give it the final look. Keep in mind you can use positioning of blurred background highlights and shades to enhance the contrast of the main object - put darker areas behind highlighted parts and light areas behind shaded parts and so on.
This is it, roughly. Most of all, until I got that final look of the fur, it was loads of play between dark and light brushes, I ran through the entire face several times, each time adding more shaded or more lighted hairs, and each time getting closer and closer to what real fur would look like.
I don't know how effective was all this, but it was the best I could think of so far. Virtually it doesn't matter in what order you'll add shades and lights (and it depends on the fur's colours), the trick is to balance them well in order to shape out head or body relief, and to always give it some randomness when it comes to detailed single hairs.
Related content


Comments: 17

")

wooo it look authentic real I love it so much keep doing amazing jobs :3
👍: 0 ⏩: 1

Beautiful details! Thank you so much for sharing!
👍: 0 ⏩: 1


Thank you! I appreciate your support

👍: 0 ⏩: 0
No prob. Hope it was helpful
 (Smile)")
👍: 0 ⏩: 0

I would be interested in a written description to accompany the images please. Thanks
👍: 0 ⏩: 1
There you go. I hope you find it useful
👍: 0 ⏩: 0

Oops! Sorry, had copied twice step 4 skipping step 5. Anyway, fixed now, so here's the actual order. Read the description for details and don't hesitate to ask if you've got any further questions.
👍: 0 ⏩: 0