HOME | DD
 Nariscuss — How I use Manual
#bokeh #depthoffield #photographylesson #camera #canon #lens #manual #photography #theory #tutorial #zoom #1000d
Published: 2010-06-23 17:44:03 +0000 UTC; Views: 6026; Favourites: 125; Downloads: 203
Redirect to original
Description
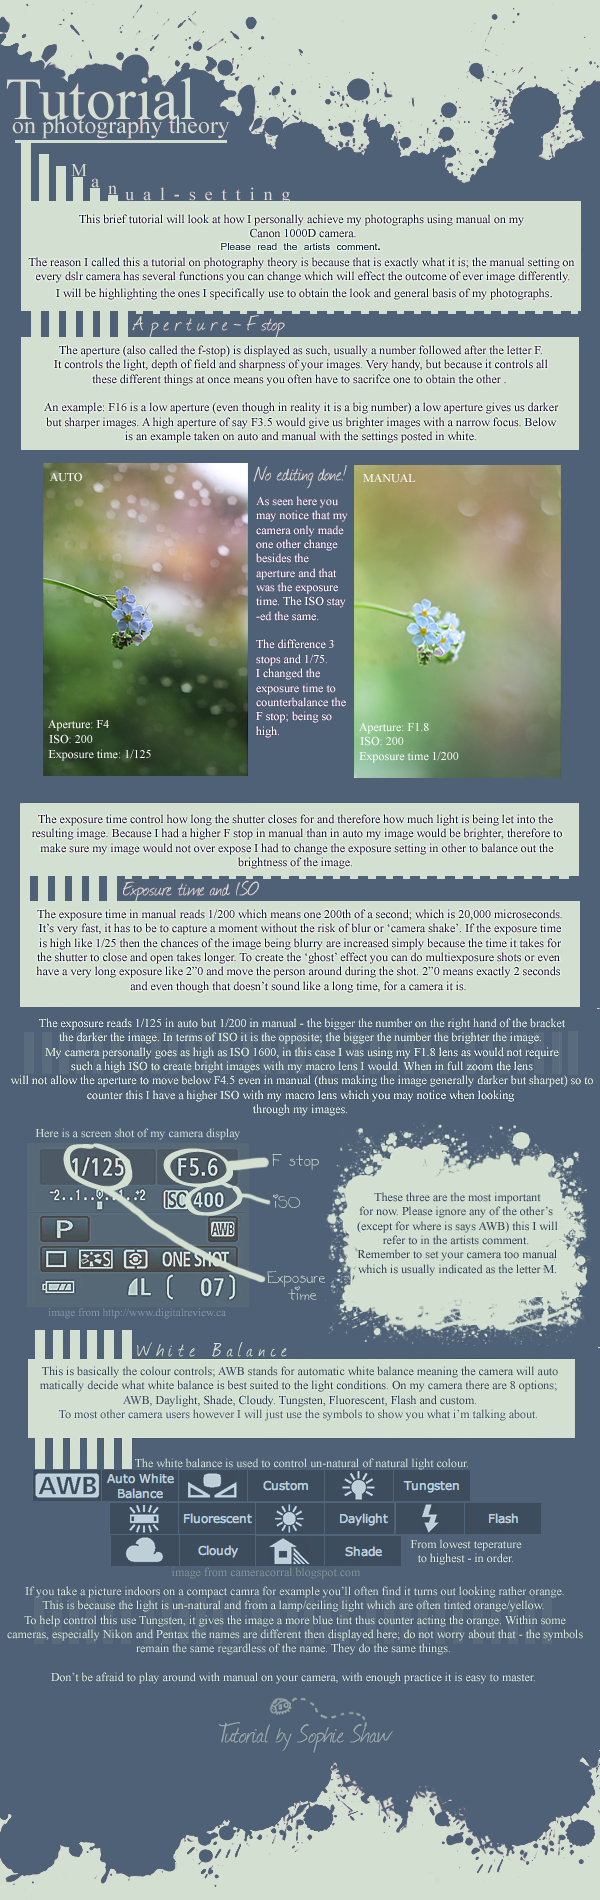
Please read everything and trying manual on your camera before asking a question, but if you have a question or correction send me a note.How I use Manual: Photography theory tutorial.
LONG COMMENT of boringness that I had to mentioned otherwise cause more confusion ;D this took me little time to do because I had little time to do it in. It's confusing but remember particular settings are backwards (F2.8 is high and F22 is low)
Here I did a tutorial on how I personally use manual to create the style in my images, a side note that I briefly mention in the tutorial:
I use a canon 1000D, but the theory applies to all camera's. If you want to know how to change the settings on your camera while in manual mode please read your camera's instruction booklet; I don't know everything about every camera model in the world. Each is very different. I've used a Nikon, Pentax and Sony before and proved skill can be applied to any camera model and make. So don't think that just because yours is not a canon camera none of this applies.
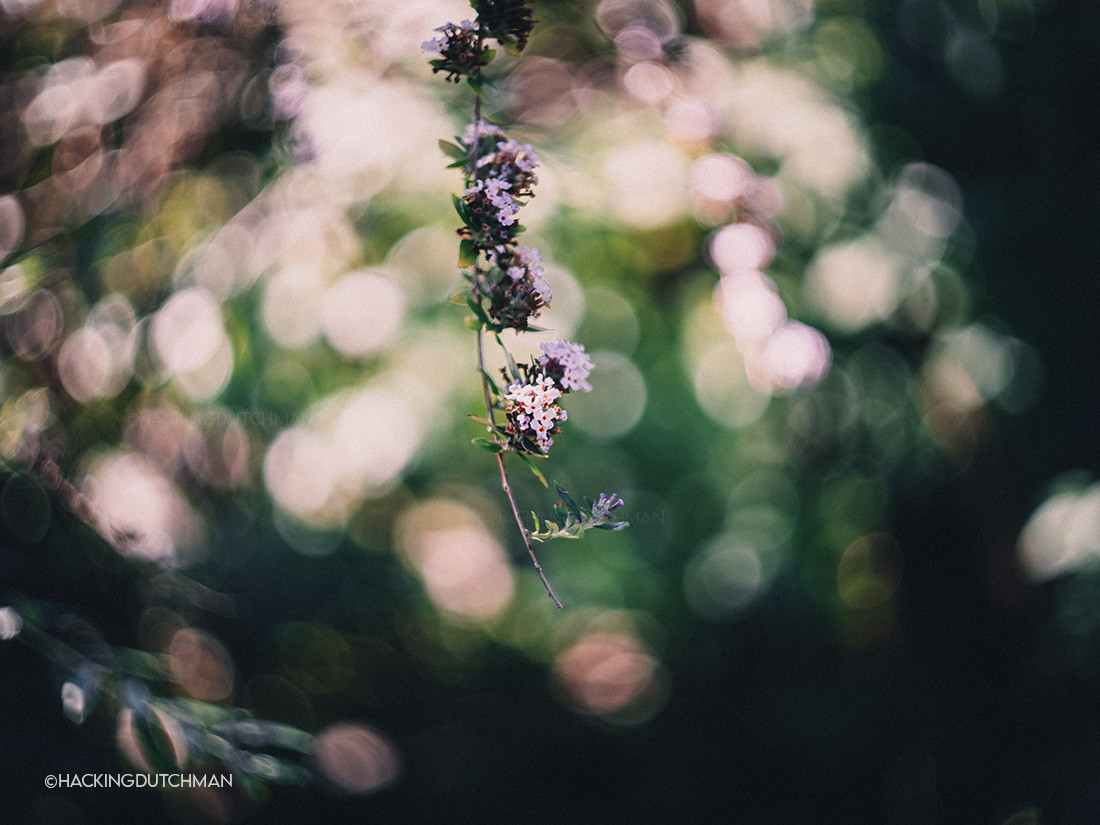
The lens you use will effect the outcome. In this tutorial I made reference to my macro lens which is a sigma 17-70mm and my canon 50mm F1.8. With my 50mm the aperture creates the great depth of field, with my macro lens it is the lens built zoom.
The zoom on a lens effects the aperture. With my macro lens at 17mm it tells me my aperture can go no higher then F2.8 but in full zoom of 70mm it changes to F4.5. This is because in full zoom the chances of shaking the lens and causing the image to blur are increased.
The 50mm F1.8 however has a extremely high aperture, but because the length is only ever 50mm it does not zoom therefore the aperture can always remain as high as F1.8. But can go no higher simply because that's how the lens is built. There is a canon 50mm F1.4 which is £100 more then the F1.8 because it's aperture goes that much bigger.
Oh and with ISO set at for example 1600 noise is twice as much. With an ISO of 200 it is far less. This is why black and white photographers prefer an ISO of between 400-100.
The increase of noise can be overcome (as I discovered) with brighter images, the noise levels appear less in regards to colour, because the noise is lighter and much harder to see. An ISO of 1600 or higher is usually only appropriate when in a dark setting anyway, but I increased my ISO to combat the fact that with my macro lens the higher aperture was making my images darker.
Lastly white balance is briefly picked up, I say briefly because I only remembered it's importance last minute, haha! I fail. Cloudy and Shade is more orange, Tungsten is more blue and daylight and florescent is more white. The Flash white balance setting is used to automatically set the colour balance when you use flash (duh) custom I have never used and or needed to and AWB is explained.
Hope this helps! Somehow...ahah!
Deviants who have used this tutorial in practice.
Related content


Comments: 26


I wanted to tell you thank you for this!!! so much! You have no idea! I used it to take this photo: [link]
What do you think?? your pictures are truly truly gorgeous and I look up to you so much! Again, thank you for sharing some of your secrets!
👍: 0 ⏩: 1

Aww ")
👍: 0 ⏩: 0


Thanks sooo much! I just got my hands on a DSLR, so this is going to come in handy!
👍: 0 ⏩: 1
Thats alrighty sweetie
👍: 0 ⏩: 0

Thanks you, this is really helpful. I was always afraid of manual because I never reallt knew what to do with it, but i'll be experimenting with it now!
 (Smile)")
👍: 0 ⏩: 2
Thats alrighty sweetie, glad I could help!
👍: 0 ⏩: 1
And thanks for the fave!
👍: 0 ⏩: 0
From using your advice, I took this: [link]
I'm proud, because I haven't edited the colours one bit! Thanks again
👍: 0 ⏩: 0

You're very welcome, sweetheart!
👍: 0 ⏩: 0

I would've loved to have read this when I didn't understand basics, it would've saved me loads of trouble and confusion. Very helpful, thanks!
👍: 0 ⏩: 1

This will be helpful someday for when I have a DSLR lol ^^ Another wonderful deviation ^.^
👍: 0 ⏩: 1
Thank you sweetie!
👍: 0 ⏩: 1
I really hope I can get a Canon Rebel T1i REALLY bad but I doubt i will get it till I am in college. I still have yet to buy a car.

👍: 0 ⏩: 1
oooh! Nice
👍: 0 ⏩: 1
Thanks!
👍: 0 ⏩: 0

ooh yes it does! thanks for a very informative and helpful tutorial
👍: 0 ⏩: 1
Your very welcome and thank you!! Glad I could help (:
👍: 0 ⏩: 1