HOME | DD
 spaceship505 — See-through Pendants

Published: 2012-08-30 14:54:23 +0000 UTC; Views: 307; Favourites: 1; Downloads: 0
Redirect to original
Description
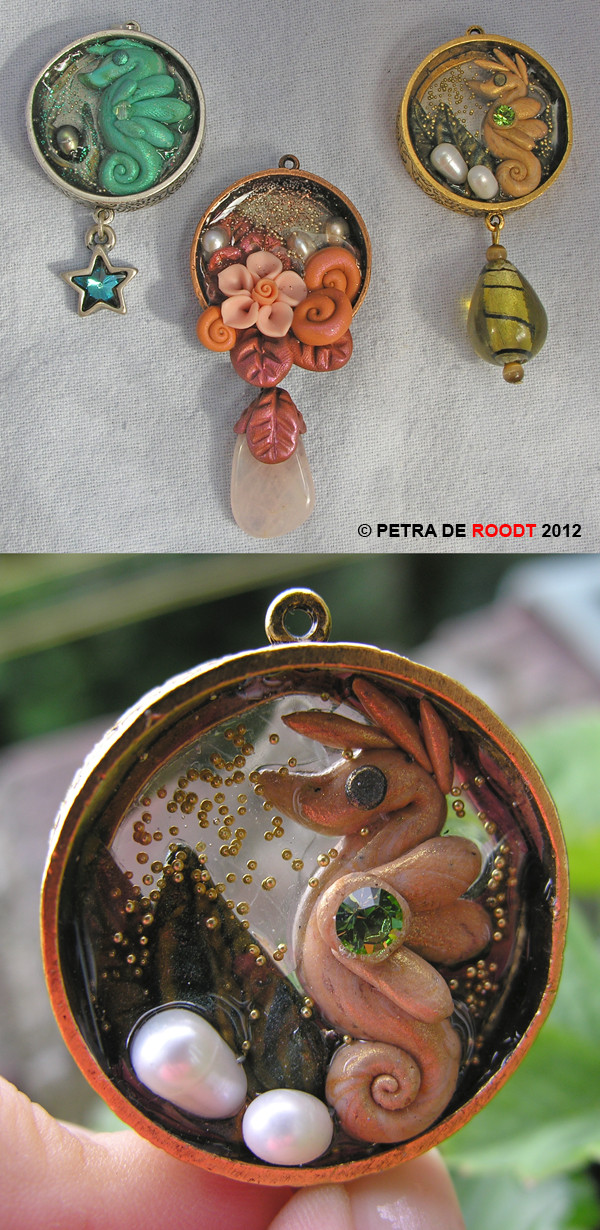
These pendants are larger than the previous pendants I uploaded, the ring is about 3½ cm or 1.4 inch in diameter. Compared to my dragon pendants they're still fairly modest though


I got the rings from Christi Friesen and used her tips. As the rings are open I cut out circles from a mica sheet (natural product, transparent and oven safe like glass, but safer and easier to work with, like plastic) and glued these to the back of the rings with super glue, adding a bit of Fimo liquid and baked them, to make sure they were leak proof once the resin would go in.
I first made the silver/turquoise one using scrap clay (the items are so itty-bitty, not a lot were needed) and a pearl, then the copper/brown&pink one, using more pearls and a Fimo flower bead (I'm out of them now, gotta make my own from now on


 ) and last the golden one, with pearls and Swarovski rhinestone, going back to the seahorse theme because I couldn't come up with anything else and I really wanted to bake the other 2.
Once baked I had to wait for the sun to shine and then I kept adding thin layers of Magic Gloss, encasing items such as glitter and/or micro beads with each new layer.
Lastly I added a glass bead, a rose quartz stone and a silver tone pendant with Swarovski star, which I had lying around and suited the chosen colour schemes.
Now all I need to add are some nice loops so the pendants can be worn on fine chain necklaces.
Related content
Comments: 4

I have made a few see through pendants, and they are always a big hit.
How do you like the magic gloss? I have some at home, but haven't used it because I am impatient and don't like doing thin layers.
👍: 0 ⏩: 1

I love working with it because it requires no mixing, can be used straight from the bottle and cures in 5 to 10 minutes if it's really sunny outside (I am getting an UV-light though, come winter). I kept doing them in order (put on a layer plus glitter/micro beads, put the items outside, began on the next) and whenever the last one was done, the first one was cured and ready for the next layer. From what I've gathered from resin that needs to be mixed the curing time is longer so if you want to encase small things in several layers you're not going to be done in half an hour (though I imagine it's good for thick layers and big projects). Plus, you know, having to measure and mix and getting it just right. That's something I don't like
👍: 0 ⏩: 0

These are so pretty. I like how the dangling parts elongate the pendants and extend the design.
👍: 0 ⏩: 1

Thank you
On one hand it was a bit of a necessity as the rings have 2 loops and they don't make sense if you don't use both. I could have turned the rings before adding clay so they could be fastened to a (hand made) necklace that way, but I prefer dangling pendants myself and this way you can add them to a chain necklace of your own preference or a short one this time, a long one another time.
👍: 0 ⏩: 0


