HOME | DD
 chemb0t — Render to ink workflow test - Dack
Published: 2012-06-24 09:03:19 +0000 UTC; Views: 1227; Favourites: 21; Downloads: 19
Redirect to original
Description
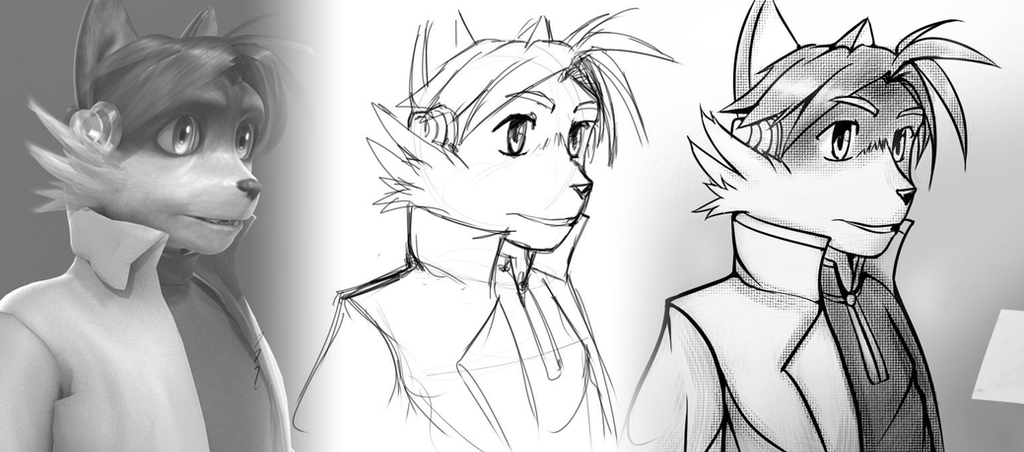
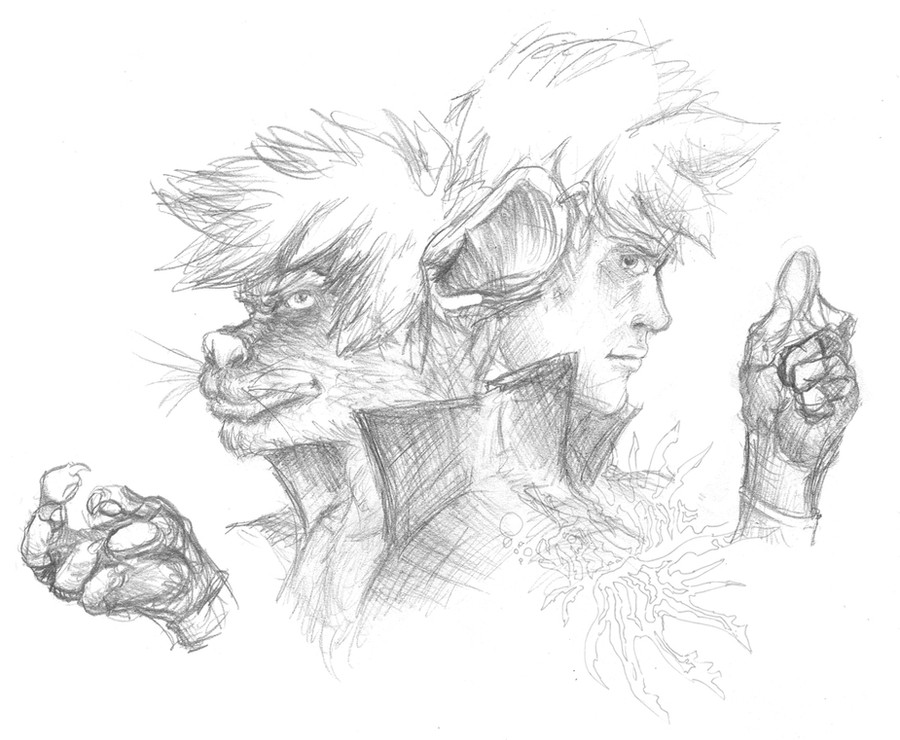
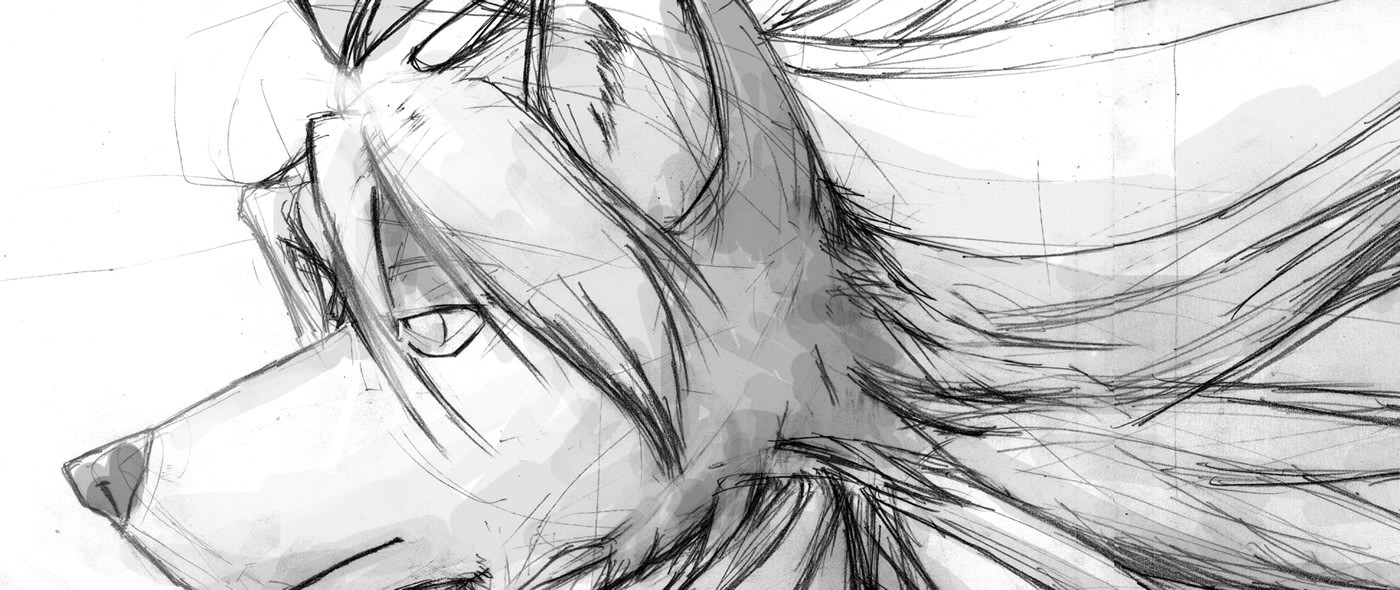
Here's a quick workflow experiment to get more familiar with several tools currently at my disposal;Daz Studio and Zbrush - I modeled and sculpted a reference of Dack in Zbrush and then brought it into Daz Studio to pose and render. The idea is that if I was to make a full fledged comic or manga, this reference would allow me to draw out panels and keep a high level of consistency with the character, no matter what angle I would 'draw' him from. To get to the stage on the right, I took a render out of Daz Studio, desaturated and boosted the contrast, then roughly traced a sketch over it with the proper details. From there I took it into sai and inked the sketch.
Sai Painter - Practiced with the ink and stroke stabilizer to 'ink' my render. I then took advantage of the paper textures to give it a screen-tone look.
Samsung 7 Series Slate - All of this was done on my new slate pc. You can think of it as a wider, slightly thicker ipad, but runs windows 7 and has a pressure sensitive Wacom digitizer. Very light and responsive, even with the serious programs like Maya, zbrush and Photoshop. I made use of a custom touch screen buttons in lieu of a physical keyboard; [link] . It took some getting used to but it makes the tablet/slate experience quite enjoyable. =]
-----------------------------------------------------------------------------------------------------------
Results
I found it to be a fun and very rapid process to do once I had the model at my disposal. The sketch and ink process took a little less than 30 minutes to complete, and I could definitely see myself working this way to block in comic panels or start full paintings from. Although I didn't use it much in this example, lighting in the rendered image would work as great reference as well if I wished to make a more detailed illustration.
Possible Uses
Ultimately I think the usefulness of this approach depends on the kind of detail and depth needed for a given character. Because of the extended setup time (modeling, sculpting, rendering etc.) it probably makes sense to use methods like this only if you plan to do more than one picture of the subject, and if the subject in question has a fairly finalized design.
So if it's a single illustration with a character that you don't really need all angles of, it may be better to do it the traditional way and draw from scratch. However if you are doing a series of images with many different angles of the character, say for comics or profile shots, this may be something to try out. It may also be useful as a general drawing reference. You could render out specific poses, expressions or angles and see if you can match it on your own.
Anyway, I hope you find this useful. Feel free to ask questions. =]
Related content


Comments: 3


I like it, though some people may go 'omg thats cheeting you're just tracing a 3d model whaa" but the fact is the model is done by you, still in your style, and though you're tracing it you're also drawing it in your own style and tweaking it as needed.
This is a very clever and have thought of doing such myself.But I fail badly at rigging models. @.x
👍: 0 ⏩: 1

Thank you, and yes, I was expecting someone to say something along those lines. ")
👍: 0 ⏩: 0